
Version 1.41 - 2013
Last: Vers. 5.xx - 2018
- ESF Developers' Guide
- Introduction
- Getting Started
- ESF Core/Foundation Code Examples
- ESF Protocol/Application Examples
- Supplementary Documentation
- Additional Eclipse and ESF Tooling
- Resources


PART 3. ESF CODE EXAMPLES
JNI Example
· Overview
JNI Example
A Java Native Interface (JNI) is a mechanism for wrapping native C or C++ objects in Java. It allows one to run C or C++ code from within Java without executing a system call. In many cases, JNIs can be used to increase system performance. Also, the JNIs can be used to easily port existing native applications into ESF.
Overview
This example shows how to create and build a simple JNI for ESF. For this example, you must be using a Linux host machine. It is not possible to use a Windows host for this example.
In this example, you will learn how to
· Create a hello world project JNI Project in Wind River Workbench
· Deploy the created project to a target system and run it
Prerequisites
· Installing ESF Tooling into Wind River Workbench
JNI Example
Right-click the ‘Package Explorer’ and select ‘New -> Project’.
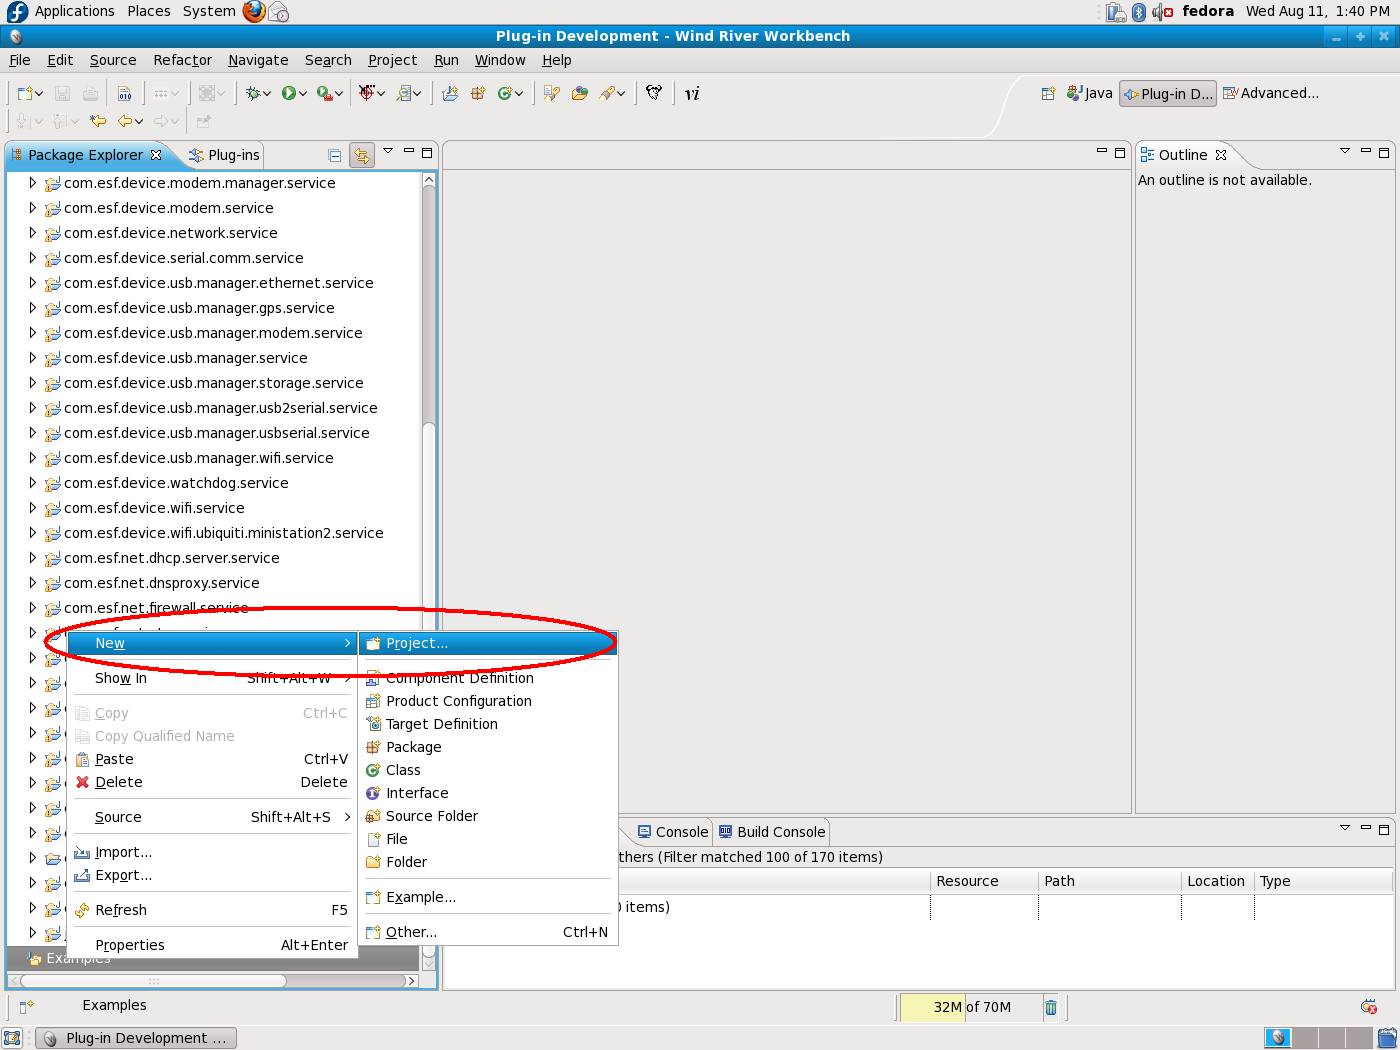
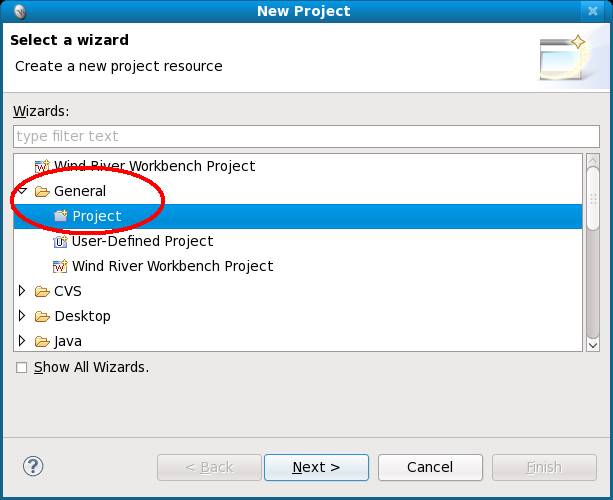
The ‘New Project’ dialog box will open. Select ‘General -> Project’. Click ‘Next’.
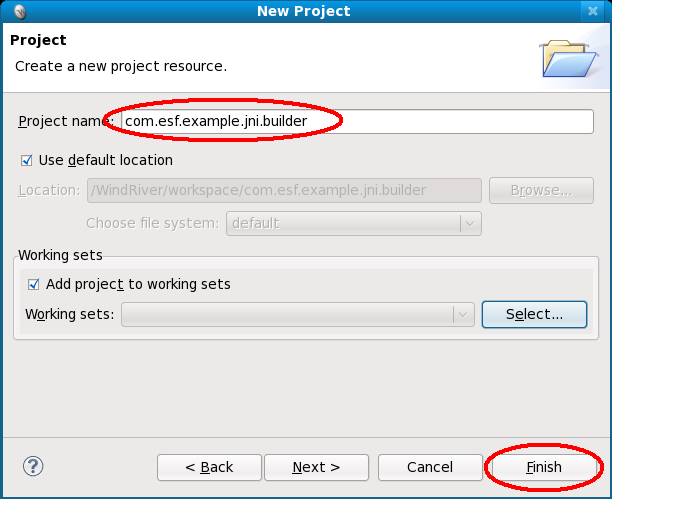
The wizard will now give you the option to set the new project parameters. Give it the name com.esf.example.jni.builder. If you are familiar with working sets and would like to add it to one, feel free to do so now. Click ‘Finish’ to continue.
You should have a newly created project that has appeared in the ‘Package Explorer’.

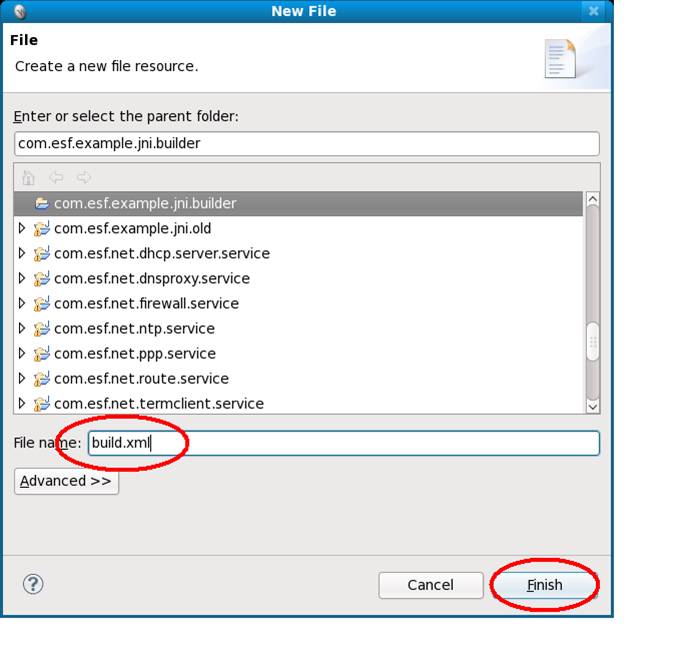
With the new project created, you can now begin implementing it. This project will act as your ‘Eclipse Builder’, which will handle the JNI portion of the build. Right-click the com.esf.example.jni.builder project in the Package Explorer and select ‘New -> File’.

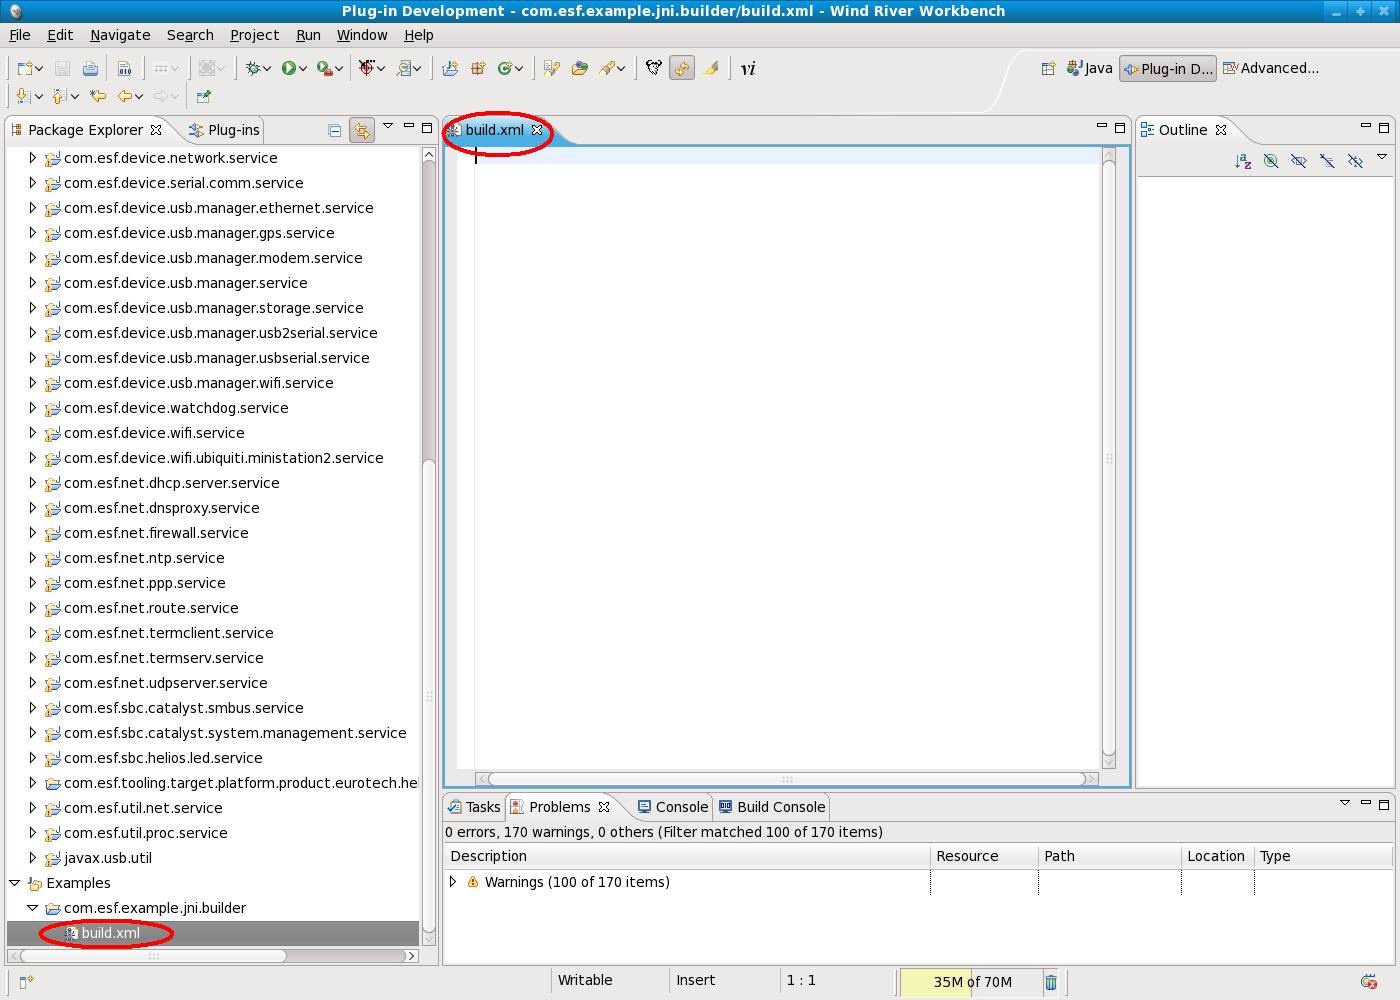
The ‘New File’ wizard will open. Name the file ‘build.xml’ and click ‘Finish’.
The build.xml file should now exist in the new project.
Next, you need to add the source code to the build.xml file. A build.xml file is used by ant to perform actions much as a makefile is used by make to perform actions. Add the following code to the build.xml file.
<project name="com.esf.example" default="dist" basedir=".">
<description>
Example JNI build
</description>
<!-- Global Properties -->
<property name="src" location="src"/>
<property name="include" location="natives/include"/>
<!-- classpath setup -->
<path id="classpath">
<!--
<pathelement location="../my_jars/my.jar"/>
-->
</path>
<!-- Targets -->
<target name="init">
<tstamp/>
<pathconvert pathsep="${line.seperator}" property="echo.classpath" refid="classpath"></pathconvert>
<echo>message="classpath: ${echo.classpath}"</echo>
<echo>message="class: ${class}"</echo>
</target>
<target name="compile" depends="init" description="compile the source">
<!--javah-->
<mkdir dir="${include}"/>
<javah destdir="${include}" class="${class}" classpath="bin"/>
</target>
<target name="dist" depends="compile" description="generate the distribution" >
<!--make .so-->
<exec executable="make" dir="natives" failonerror="true"/>
</target>
<target name="clean" description="clean up" >
<!-- Delete the ${build} and ${dist} directory trees -->
<delete dir="${include}"/>
<!--make .so-->
<exec executable="make" dir="natives" failonerror="true">
<arg line="clean"/>
</exec>
</target>
</project>
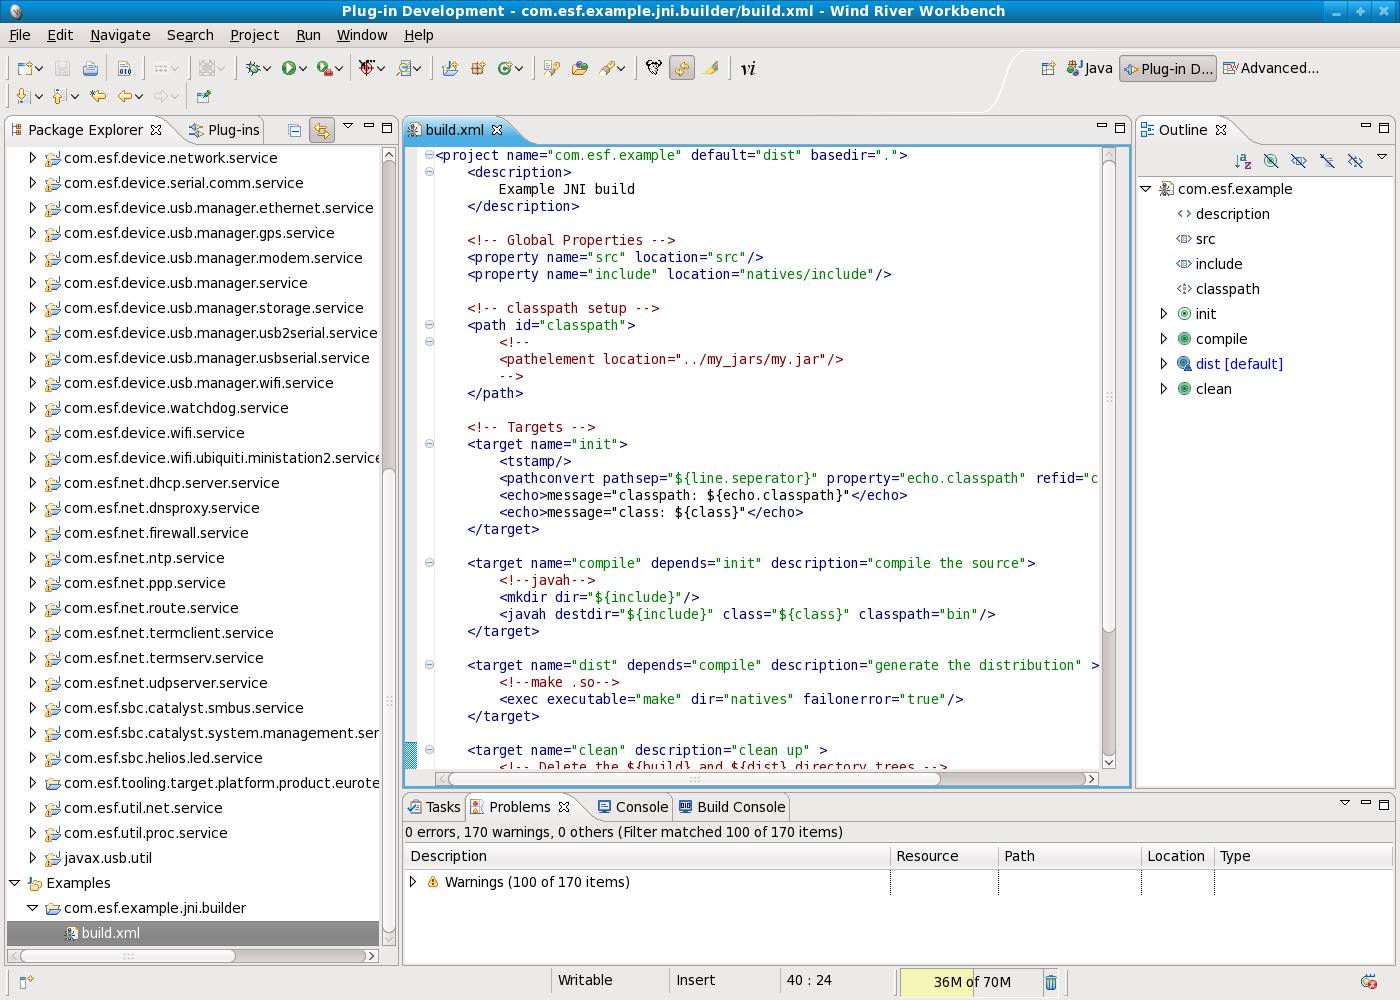
With the code now added to the build.xml file, your Workbench should look as shown in the following screen capture.
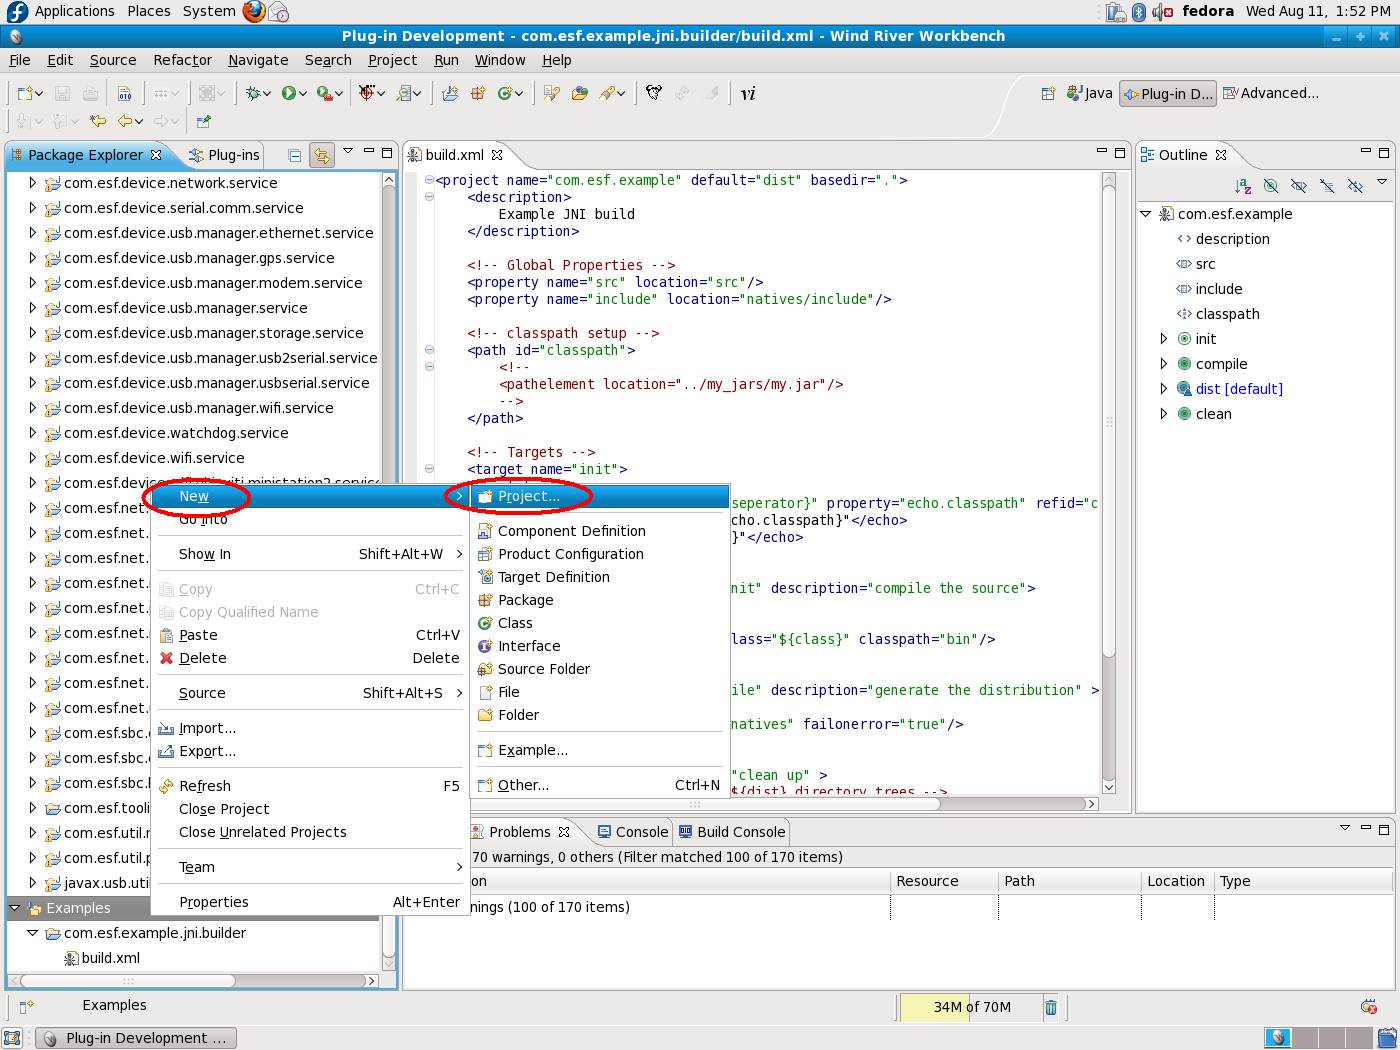
With the builder created, you can now start on your actual JNI example project. You will come back and configure the builder project later in this example. Right-click somewhere in the ‘Package Explorer’ and select ‘New -> Project’.
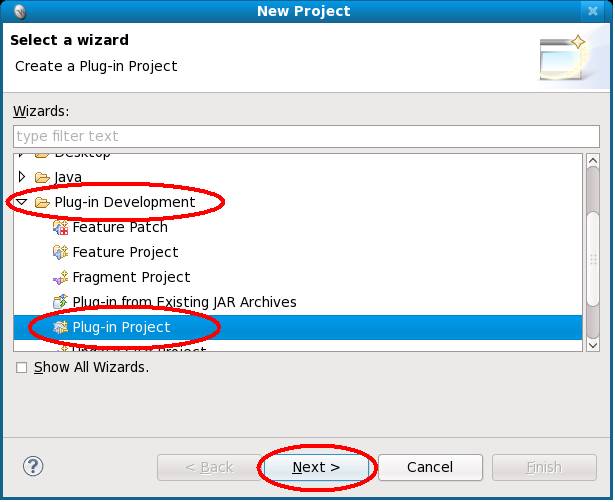
The ‘New Project’ dialog will open. Expand ‘Plug-in Development’, select ‘Plug-in Project’, and then click ‘Next’.
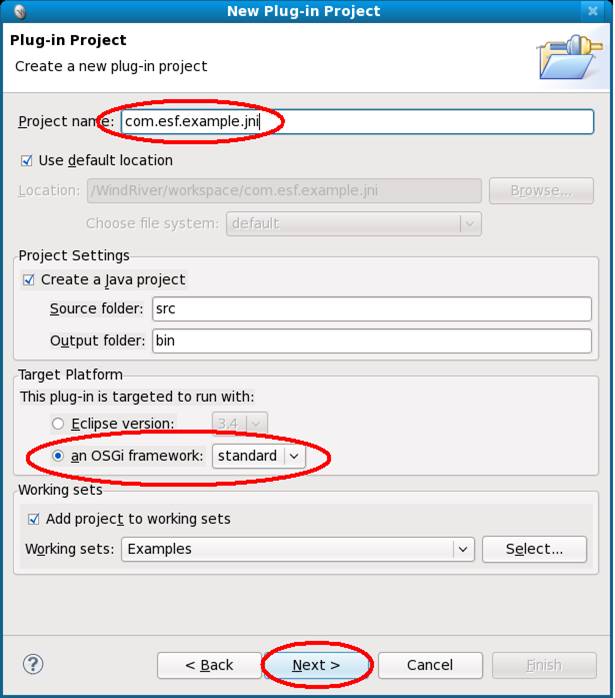
Next, set the project parameters. Give the project the name ‘com.esf.example.jni’, select the ‘an OSGi framework’ radio button, and set the framework to ‘standard’. Click ‘Next’ to continue.
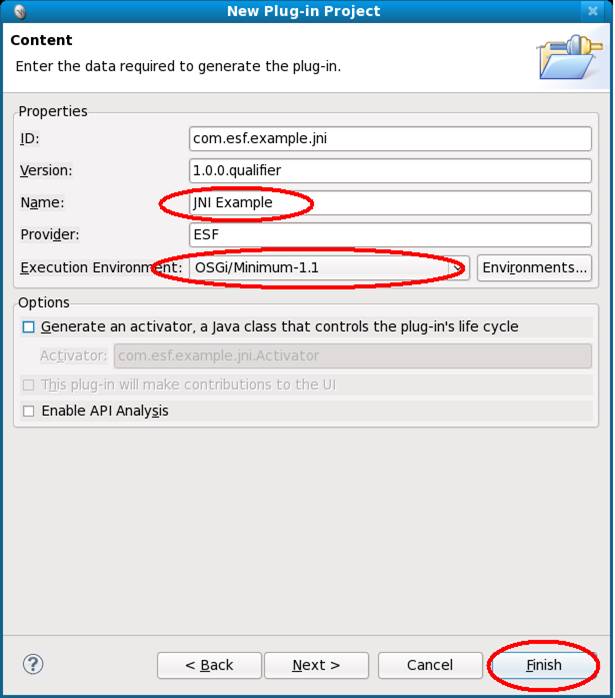
Verify that all of the information is correct, update the name of the project, and select the ‘OSGi/Minimum-1.1’ Execution Environment. Click ‘Finish’ to continue.
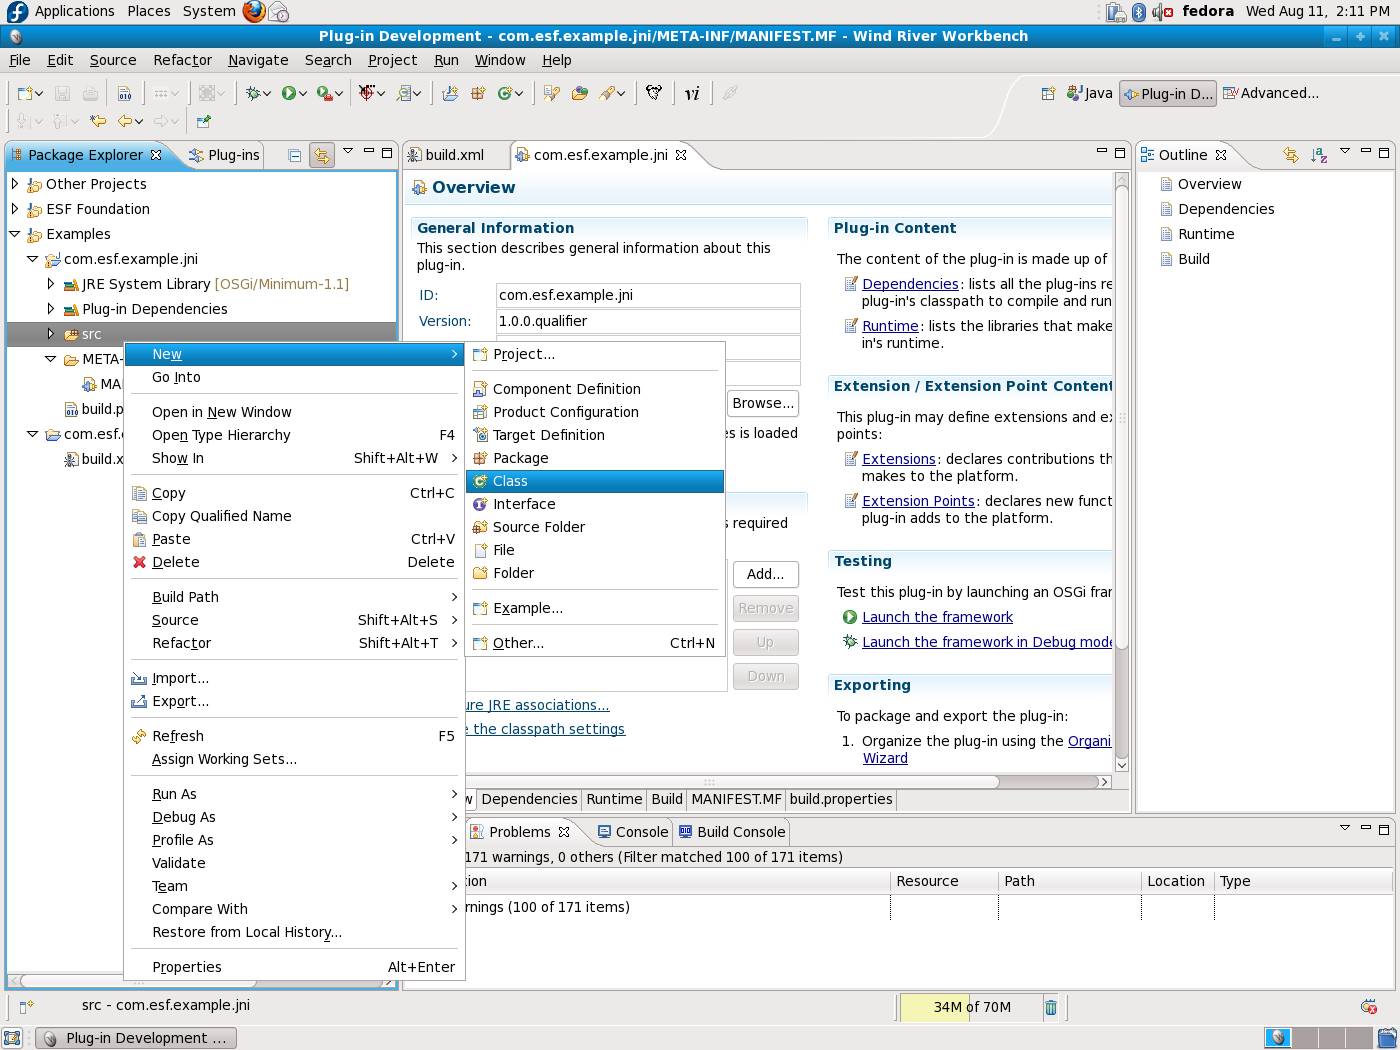
You are ready to create your base JNI class. Expand the newly created com.esf.example.jni project, right-click the ‘src’ folder, and then select ‘New -> Class’
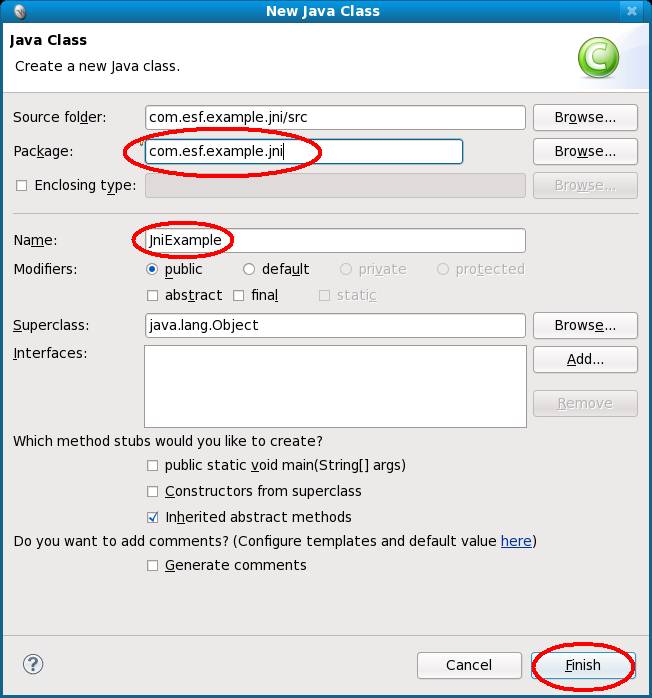
The ‘New Java Class’ dialog box will open. Set the package to com.esf.example.jni and the name to JniExample. When done, select ‘Finish’. Notice that capitalization is important here. For the example to work, make sure to enter the names exactly as shown.
You should see the newly created class definition.
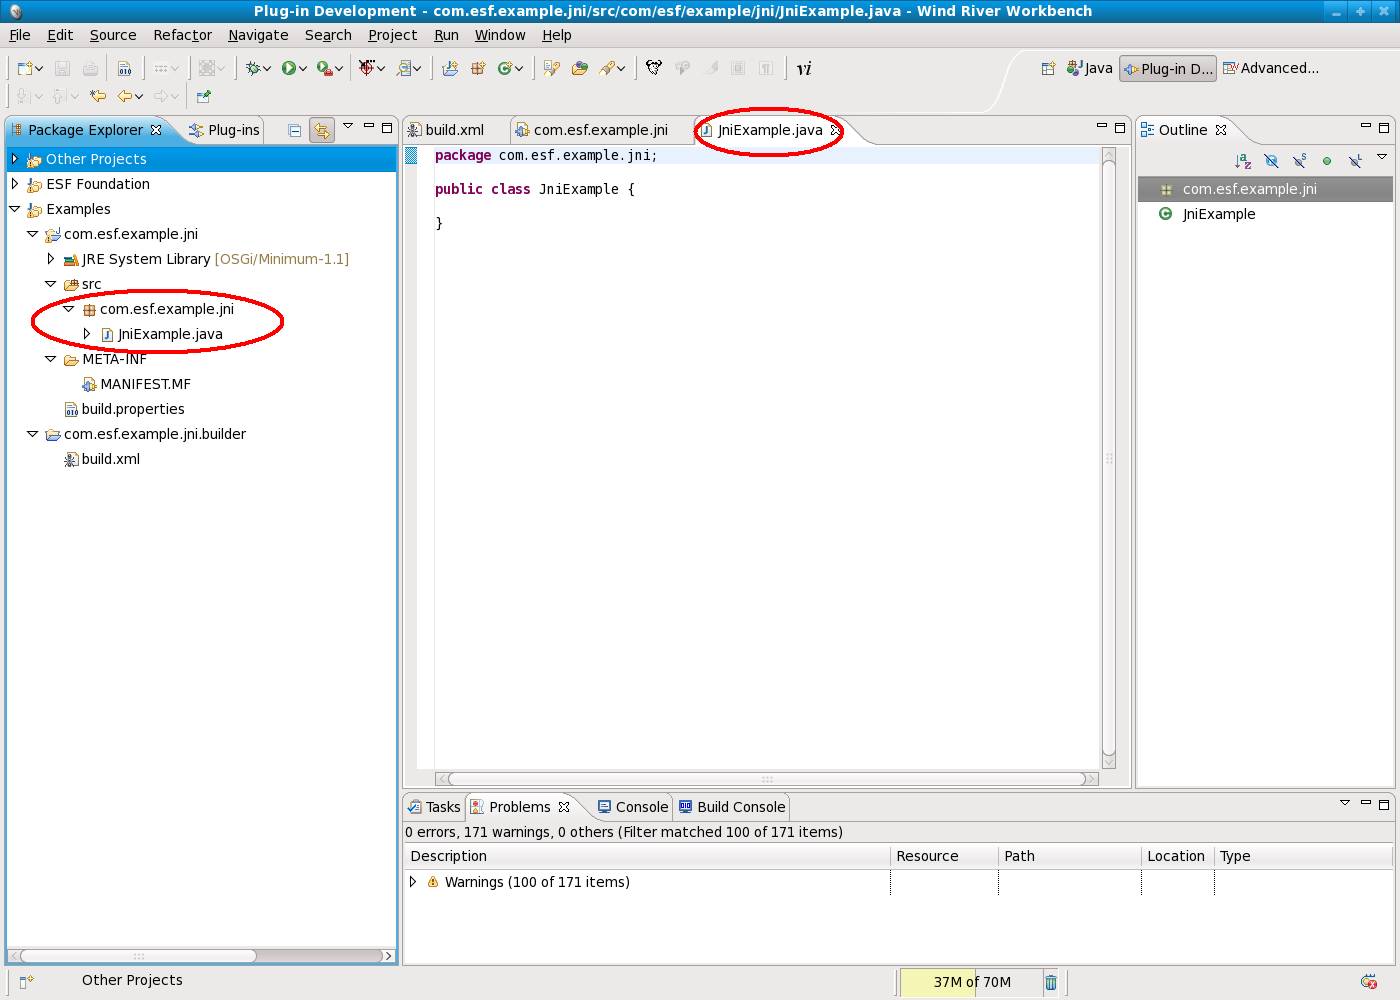
At this point, you can also insert the code for the JniExample. Copy and paste the following code for the class into the JniExample.java file in Workbench.
package com.esf.example.jni;
import com.esf.core.logger.service.IEsfLoggerService;
public class JniExample {
private static final String LABEL = "com.esf.example.jni.JniExample: ";
private IEsfLoggerService esfLoggerService;
public void bind(IEsfLoggerService esfLoggerService) {
this.esfLoggerService = esfLoggerService;
displayStarting();
doWork();
}
public void unbind() {
displayStopping();
esfLoggerService = null;
}
private void doWork() {
esfLoggerService.logInfo(LABEL + "3+3=" + add(3,3));
esfLoggerService.logInfo(LABEL + "3+(-3)=" + add(3,-3));
esfLoggerService.logInfo(LABEL + "10+10=" + add(10,10));
esfLoggerService.logInfo(LABEL + "(-5)+10=" + add(-5,10));
esfLoggerService.logInfo(LABEL + "0+0=" + add(0,0));
}
static {
System.loadLibrary("jni_example");
}
private final static native void displayStarting();
private final static native void displayStopping();
public final static native int add(int x, int y);
}
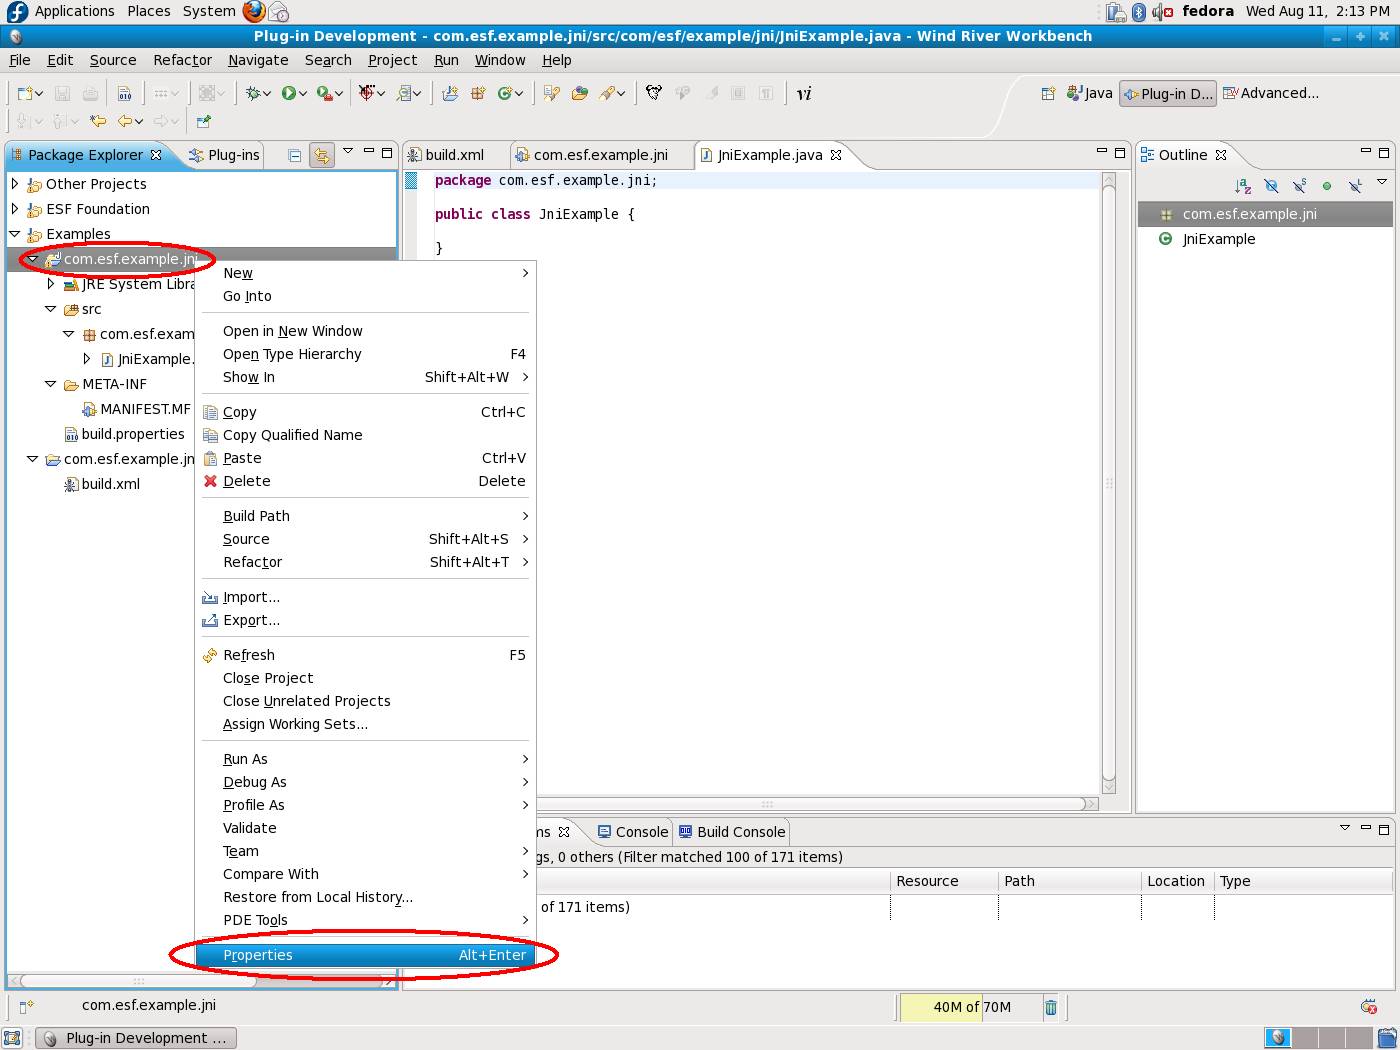
With this project created, you are now in a position to attach the builder you created to this project. Right-click the com.esf.example.jni project and select ‘Properties’.
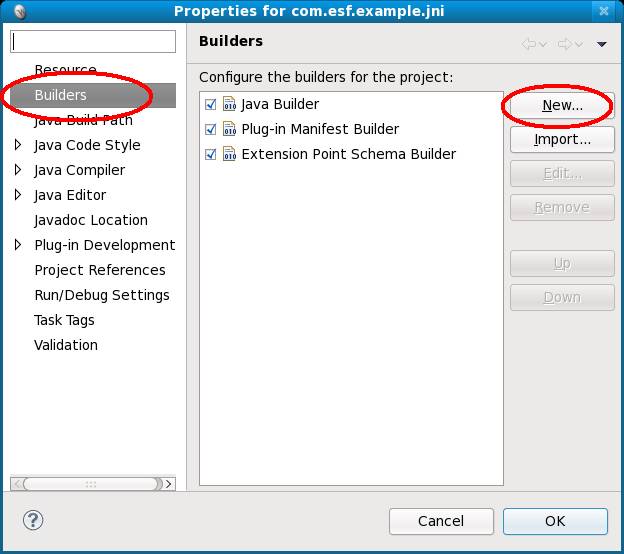
Select ‘Builders’ in the left column and select ‘New…’ as shown.
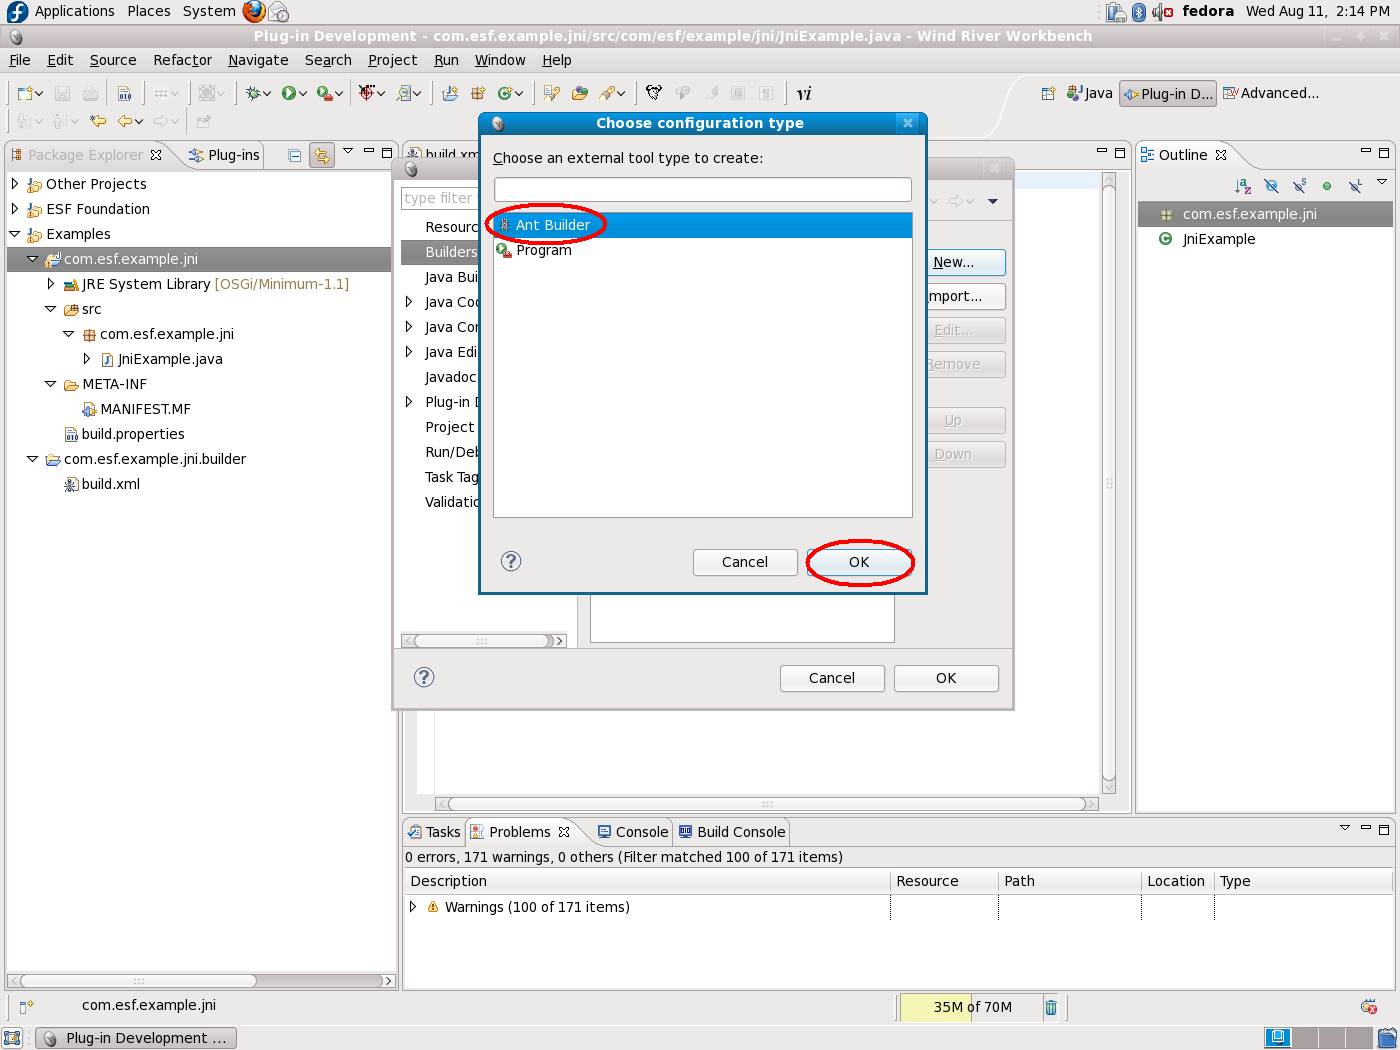
Select ‘Ant Builder’ and click OK.
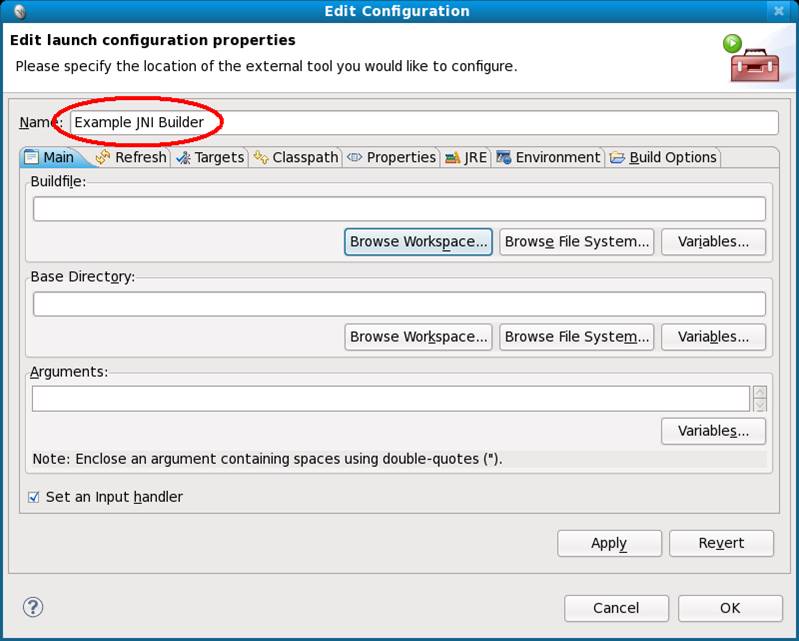
The ‘Edit Configuration’ dialog box will open. Name the Builder ‘Example JNI Builder’.
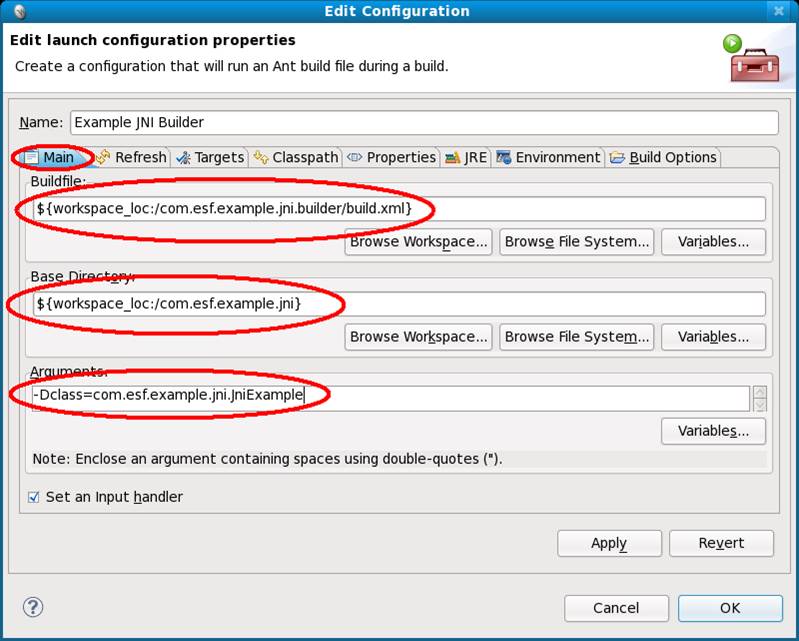
Specify the Buildfile, Base Directory, and an argument under the ‘main’ tab. The buildfile points to the build.xml file you have already created. Notice the use of the ‘workspace_loc’ variable. This use makes things more portable and is the recommended way to point to filesystem components. The Base Directory is the location of the project on which the builder will operate. The argument is a custom argument used to specify the name of the class that must be used with javah. javah is the tool that generates the C header files from an existing Java class with native components. This builder allows you to specify it so the builder is capable of building more than just one specific project.
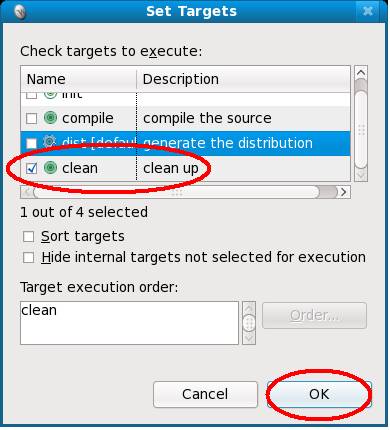
By default, the builder does not have a ‘clean’ target specified. You must make sure a clean also does a clean on the shared object JNI library you will be creating. Select the ‘Targets’ tab and then click the ‘Set Targets’ button next to the ‘During a Clean’ section.

Select the ‘clean’ checkbox and click ‘OK’ as shown.
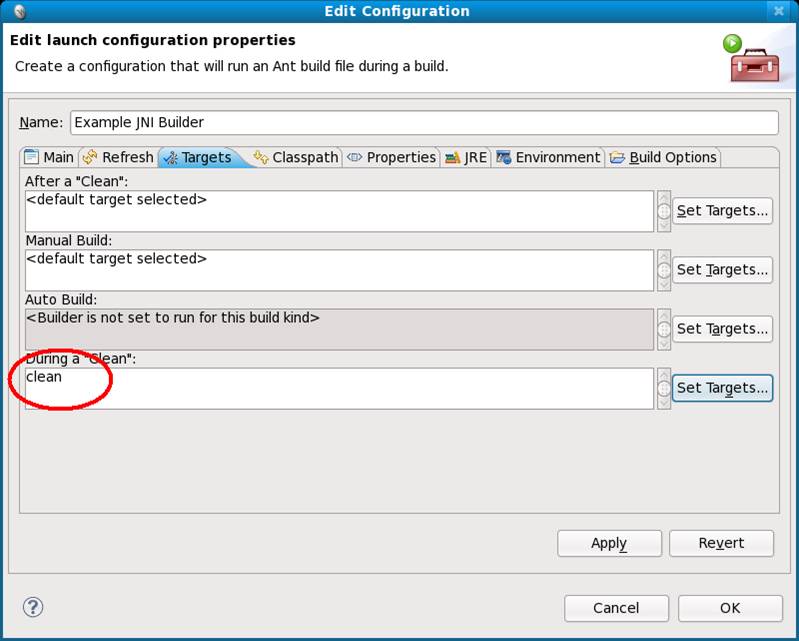
You should have ‘clean’ specified as shown in the following screen capture.
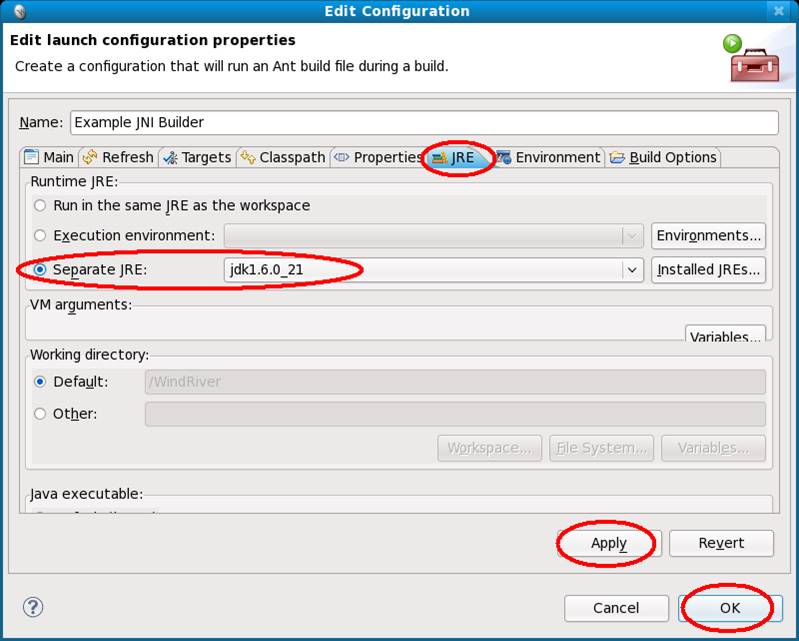
Finally, you need to specify the JRE to use for the build. In this case, Wind River Workbench is running using a different JRE than you want to build with. To specify the JRE, select the ‘JRE’ tab and then select a ‘Separate JRE’ of jdk1.6.0_21 that you installed when adding the ESF tooling. Click ‘Apply’ and then click ‘OK’.
At this point, the new builder is added. Click ‘OK’ to continue.
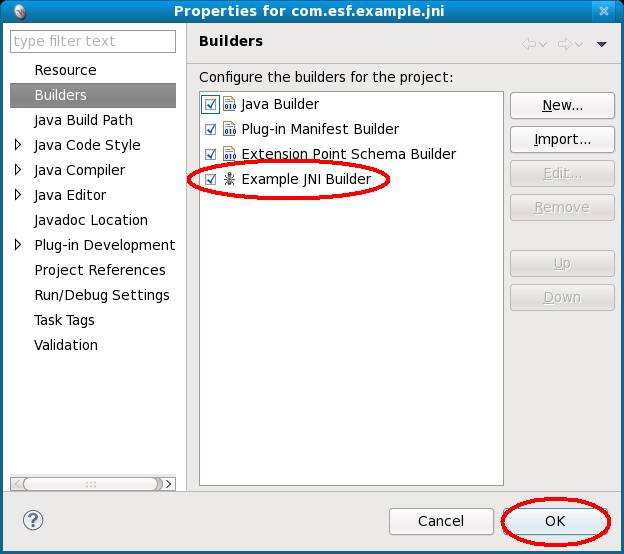
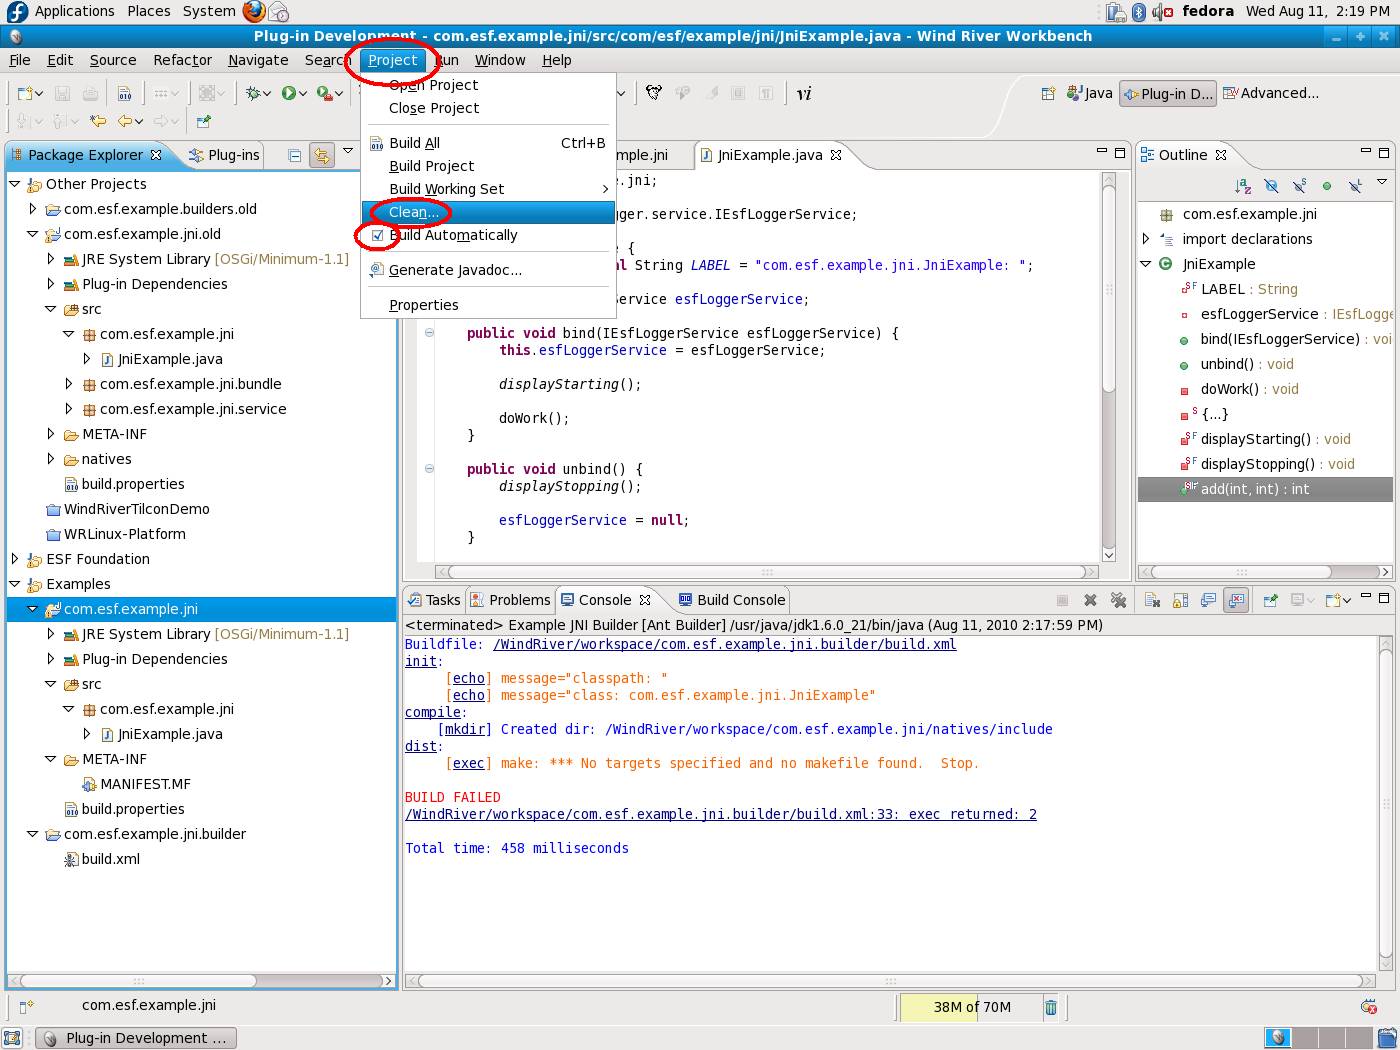
In the main Workbench window, you should now see the output of your newly added builder appearing on the console. In order for this to work, you must have ‘build automatically’ set in Workbench. This step was shown in the Adding ESF Tooling to Workbench tutorial. Notice there are some errors. The errors are OK and are a result of not having yet implemented the code.

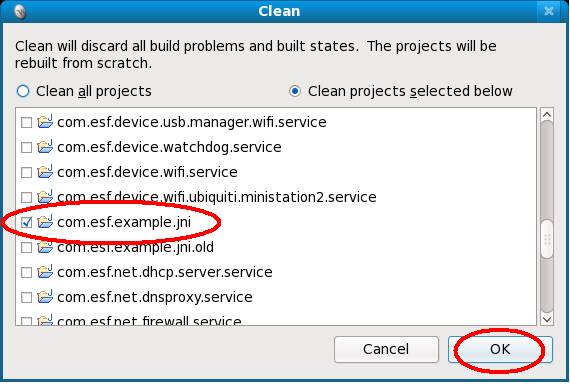
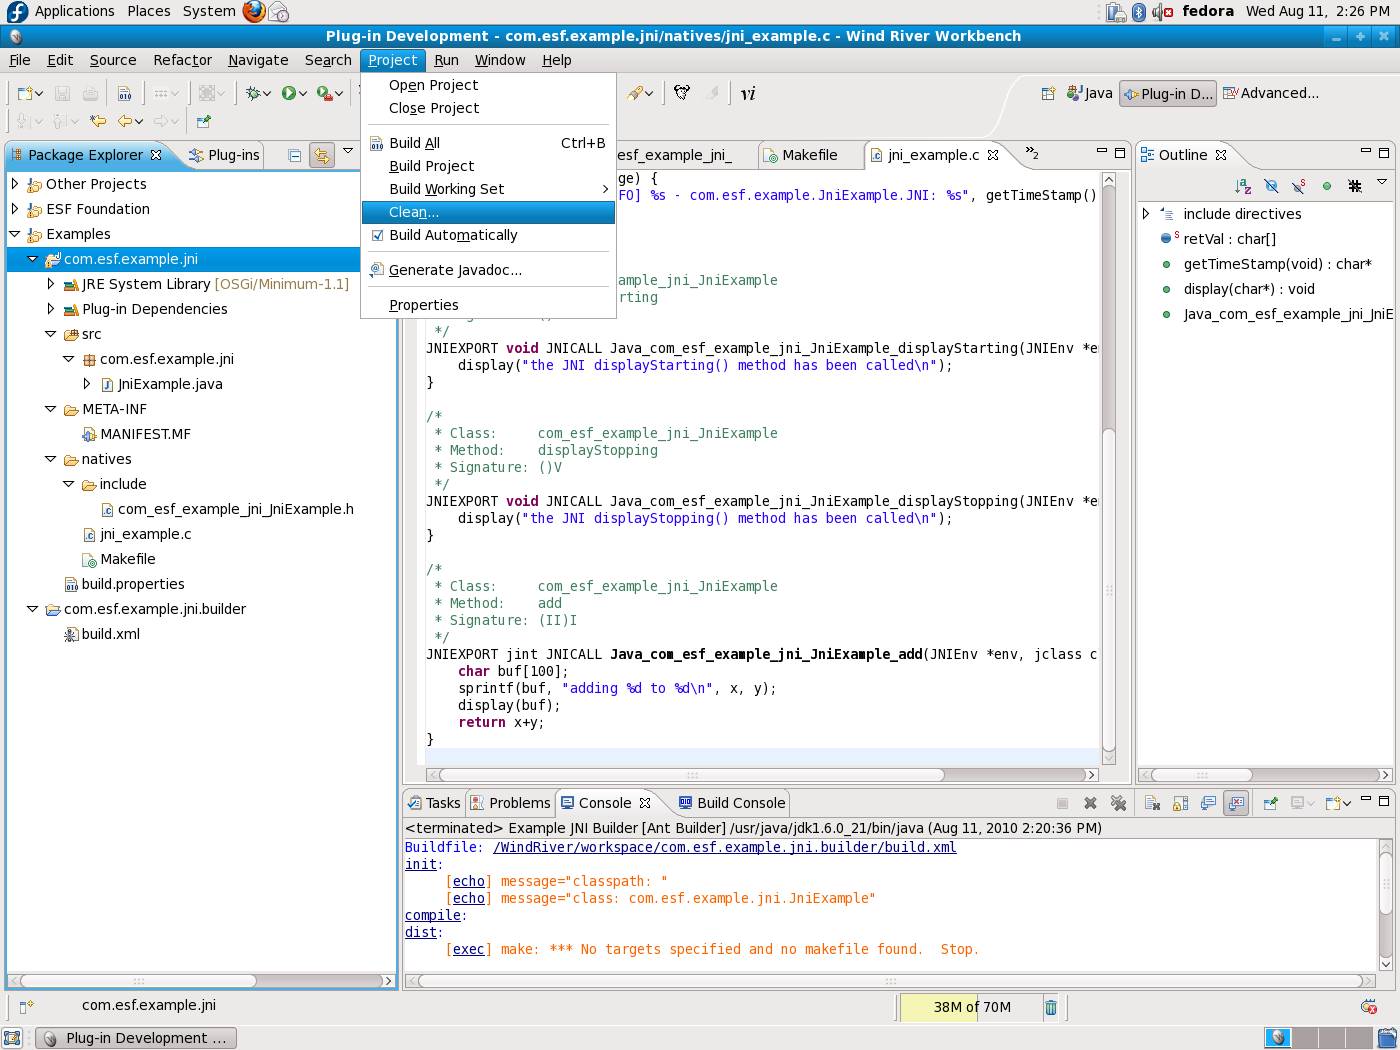
Under the ‘Project’ dropdown list, the ‘Build Automatically’ checkbox is selected. Notice the ‘Clean…’ option. Clean will do a clean, and because you have build automatically set it will also auto rebuild for use. Every time this operation occurs, you should see the output appear in the console.
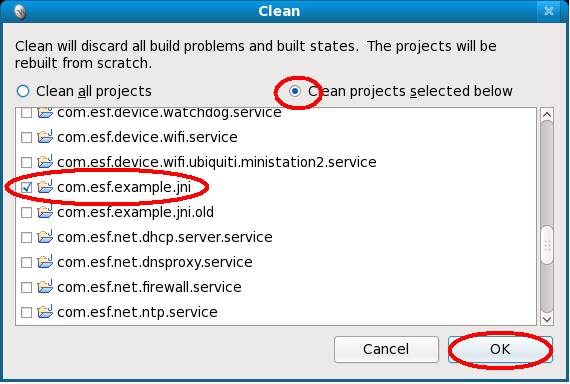
When performing a clean, you can speed things up by only selecting the one project you want to clean.
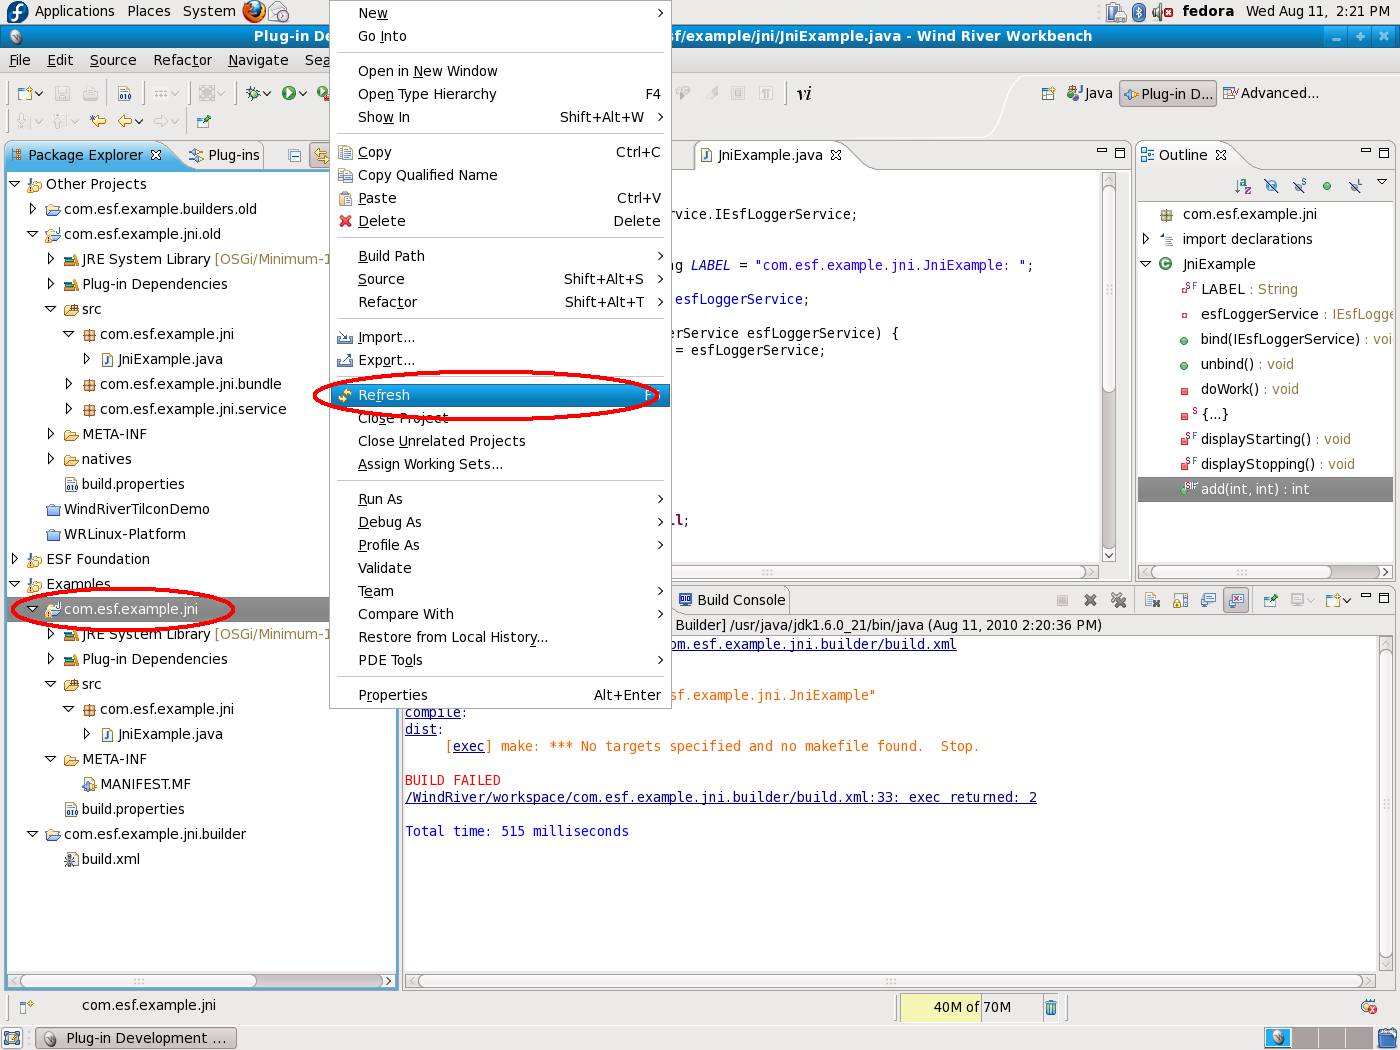
Be cautious of Workbench and syncing with the filesystem. Because builder manipulates the filesystem in the background (creating dirs, changing files, deleting files, etc), you must occasionally tell Workbench this operation has occurred. To resync Workbench with the filesystem to see all of the files, right-click the project and select ‘Refresh’.
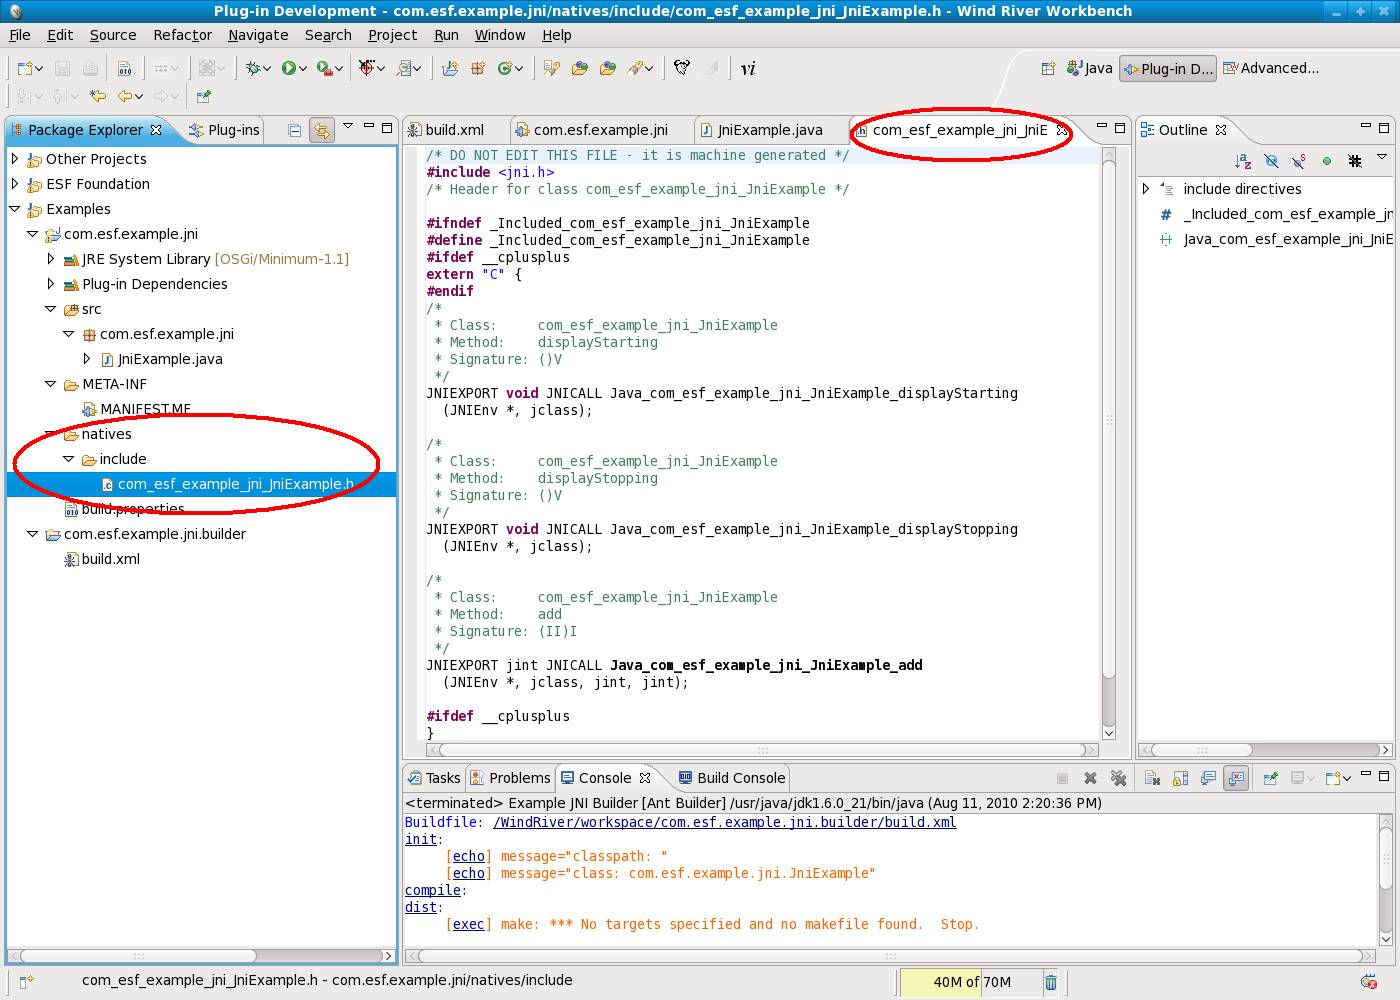
With the view refreshed, you should see a new header file. This file was generated by the javah command via the custom builder you have added. Every ‘native’ method now has a corollary function prototype.
Begin writing the makefile for your JNI by right-clicking on the ‘natives’ directory of the com.esf.example.jni project and selecting ‘New -> File’. This file will be called by our custom Ant Builder at build time.

Verify the file will be created in the ‘natives’ directory, give it the name ‘Makefile’, and then click ‘Finish’ as shown.

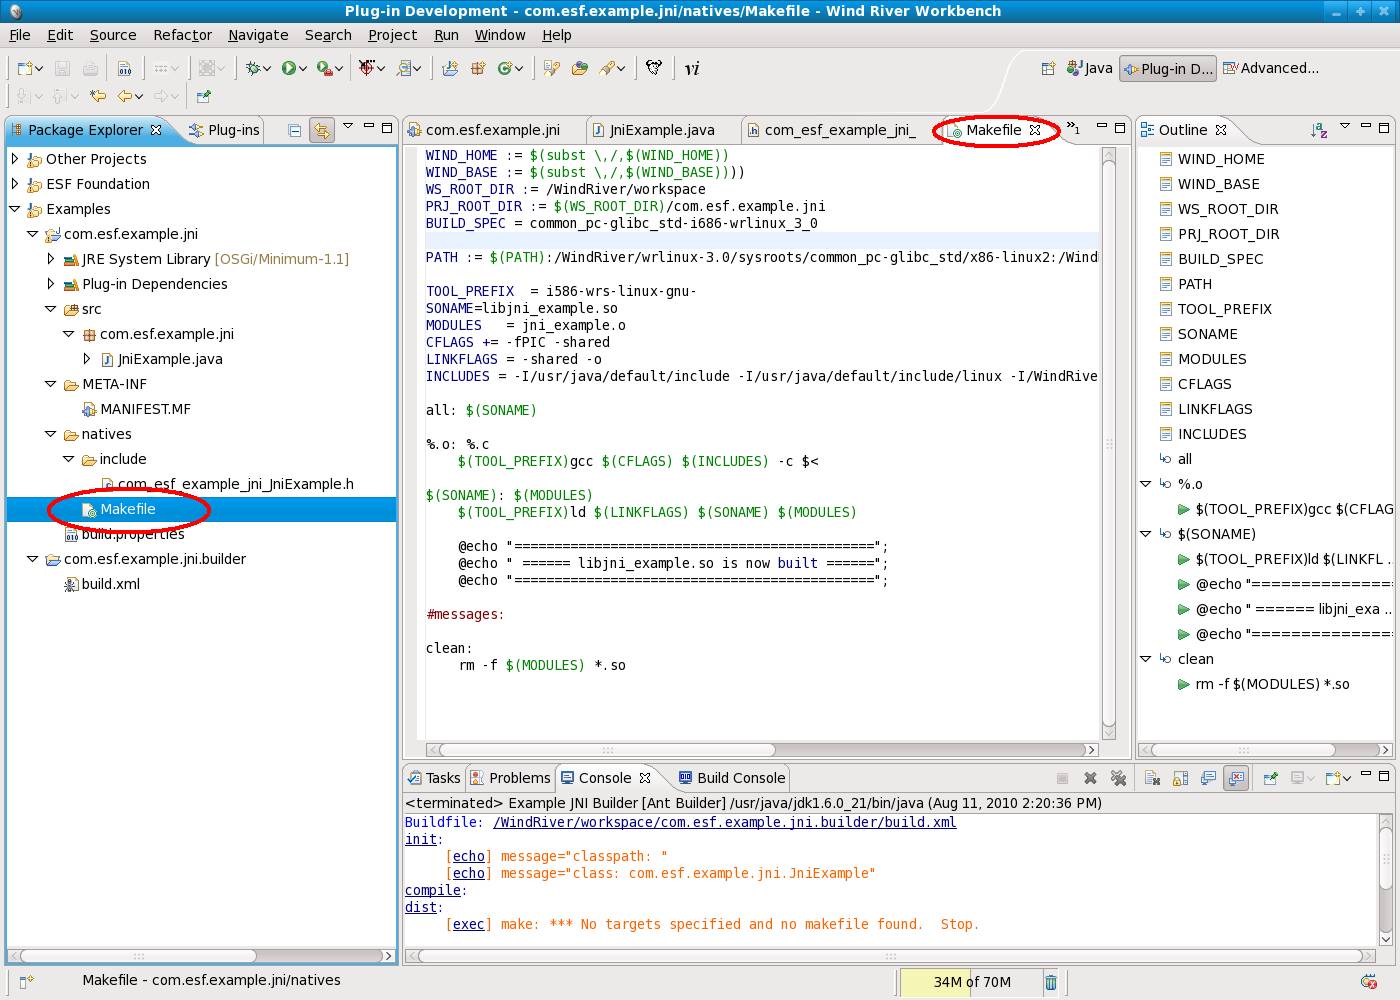
You now need to write the Makefile. The following is the code for the Makefile. Copy and paste this code into the Makefile in Workbench (be careful that there is only one tab character at the beginning of the indented lines). The PATH and INCLUDES lines may be different on your system. The PATH should point to the Wind River toolchain in order to resolve TOOL_PREFIX, and the INCLUDES should point to standard libraries and JNI header files.
WIND_HOME := $(subst \,/,$(WIND_HOME))
WIND_BASE := $(subst \,/,$(WIND_BASE))))
WS_ROOT_DIR := /WindRiver/workspace
PRJ_ROOT_DIR := $(WS_ROOT_DIR)/com.esf.example.jni
BUILD_SPEC = common_pc-glibc_std-i686-wrlinux_3_0
PATH := $(PATH):/home/wruser/WindRiver/workspace/WRLinux-Platform_prj/host-cross/i586-wrs-linux-gnu/bin
TOOL_PREFIX = i586-wrs-linux-gnu-
SONAME=libjni_example.so
MODULES = jni_example.o
CFLAGS += -fPIC -shared
LINKFLAGS = -shared -o
INCLUDES = -I/home/wruser/WindRiver/workspace/WRLinux-Platform_prj/host-cross/i586-wrs-linux-gnu/sysroot/usr/include -I/usr/lib/jvm/java-1.6.0-openjdk/include -I/usr/lib/jvm/java-1.6.0-openjdk-1.6.0.0/include/linux
all: $(SONAME)
%.o: %.c
$(TOOL_PREFIX)gcc $(CFLAGS) $(INCLUDES) -c $<
$(SONAME): $(MODULES)
$(TOOL_PREFIX)ld $(LINKFLAGS) $(SONAME) $(MODULES)
@echo "=============================================";
@echo " ====== libjni_example.so is now built ======";
@echo "=============================================";
#messages:
clean:
rm -f $(MODULES) *.so
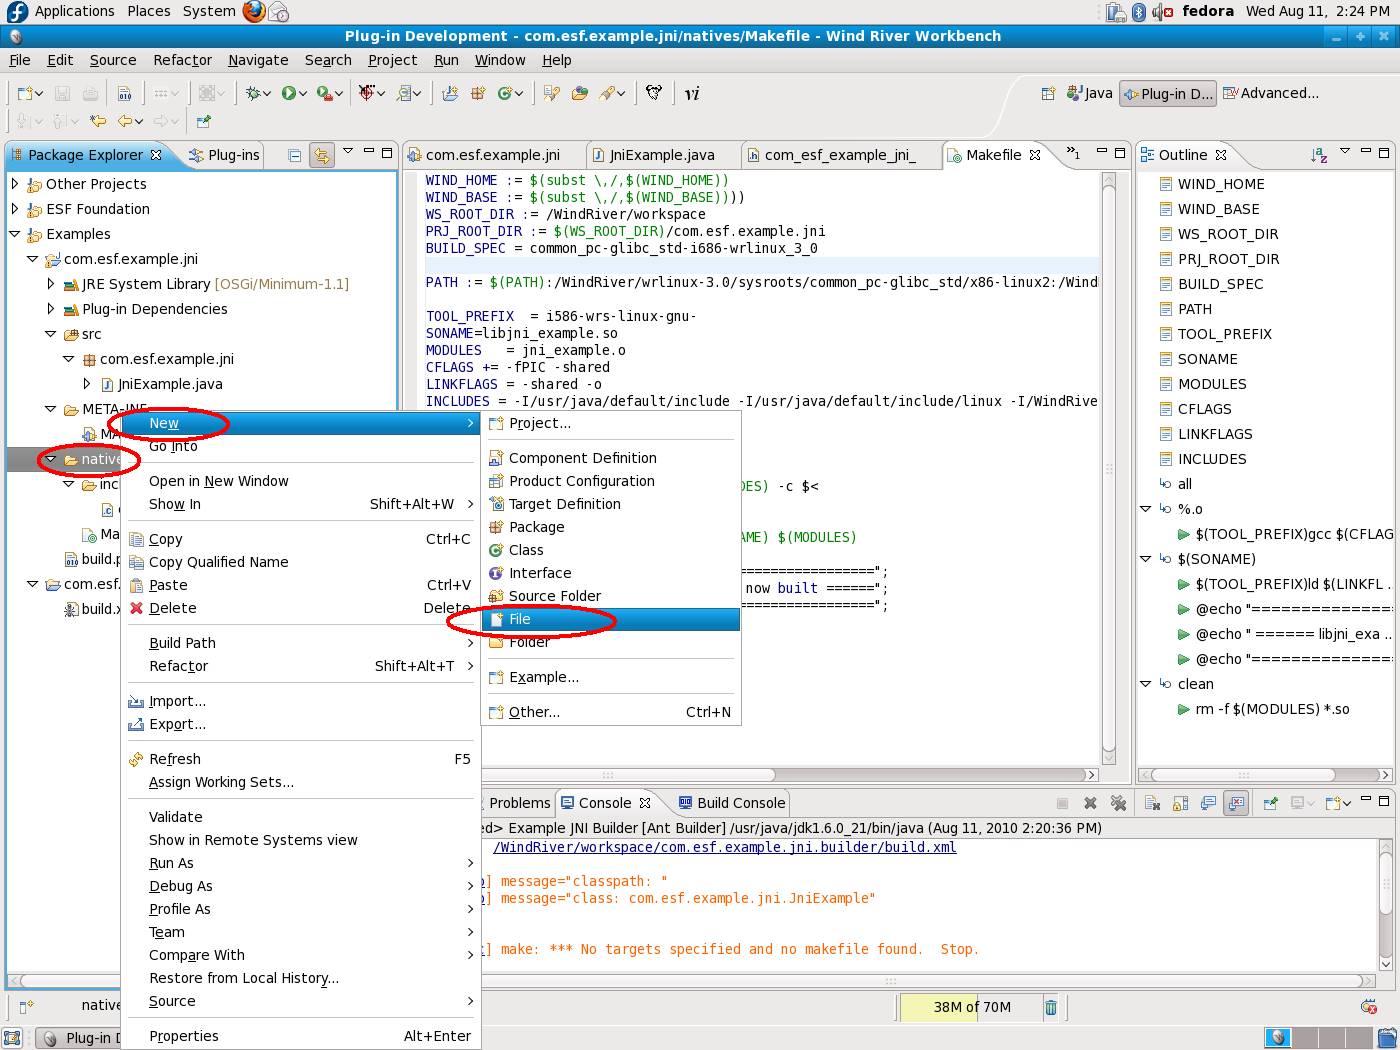
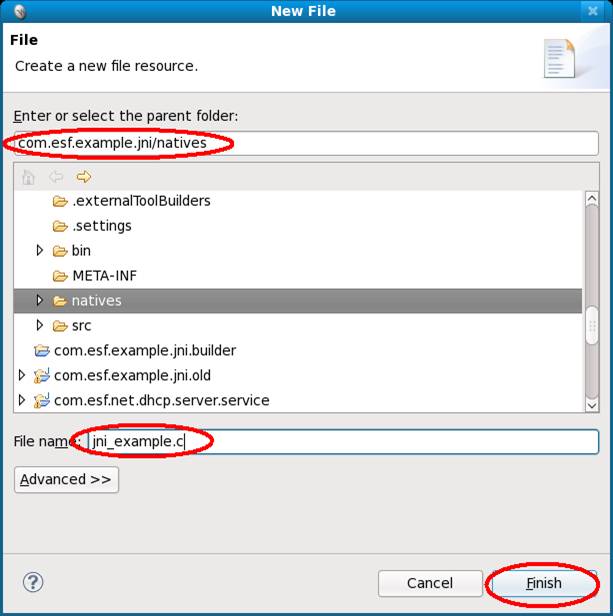
Begin writing the main C file that implements the JNI by right-clicking on the ‘natives’ directory in the com.esf.example.jni project and selecting ‘New -> File’.
Again make sure the correct ‘natives’ directory is selected, give it the File name jni_example.c, and then click ‘Finish’.
Add the following code to the C file. Copy and paste the code into the jni_example.c file in WR Workbench. The easiest way to create this code is to take the header file that was generated by javah and fill in the blanks.
#include "include/com_esf_example_jni_JniExample.h"
#include <stdio.h>
#include <time.h>
#include <sys/time.h>
#include <string.h>
static char retVal[100] = "";
char *getTimeStamp(void) {
char timeStampBuf[100] = "";
char buffer [30];
struct timeval tv;
time_t curtime;
struct tm *time = localtime(&curtime);
gettimeofday(&tv, NULL);
curtime=tv.tv_sec;
strftime(buffer, 30, "%Y-%m-%d %T.", time);
sprintf(timeStampBuf, "%s%ld", buffer, tv.tv_usec);
//clean up the time stamp length
strncpy(retVal, &timeStampBuf, strlen(timeStampBuf)-3);
retVal[strlen(timeStampBuf) - 3];
return retVal;
}
void display(char *message) {
fprintf(stdout, "[INFO] %s - com.esf.example.JniExample.JNI: %s", getTimeStamp(), message);
fflush(stdout);
}
/*
* Class: com_esf_example_jni_JniExample
* Method: displayStarting
* Signature: ()V
*/
JNIEXPORT void JNICALL Java_com_esf_example_jni_JniExample_displayStarting(JNIEnv *env, jclass class) {
display("the JNI displayStarting() method has been called\n");
}
/*
* Class: com_esf_example_jni_JniExample
* Method: displayStopping
* Signature: ()V
*/
JNIEXPORT void JNICALL Java_com_esf_example_jni_JniExample_displayStopping(JNIEnv *env, jclass class) {
display("the JNI displayStopping() method has been called\n");
}
/*
* Class: com_esf_example_jni_JniExample
* Method: add
* Signature: (II)I
*/
JNIEXPORT jint JNICALL Java_com_esf_example_jni_JniExample_add(JNIEnv *env, jclass class, jint x, jint y) {
char buf[100];
sprintf(buf, "adding %d to %d\n", x, y);
display(buf);
return x+y;
}
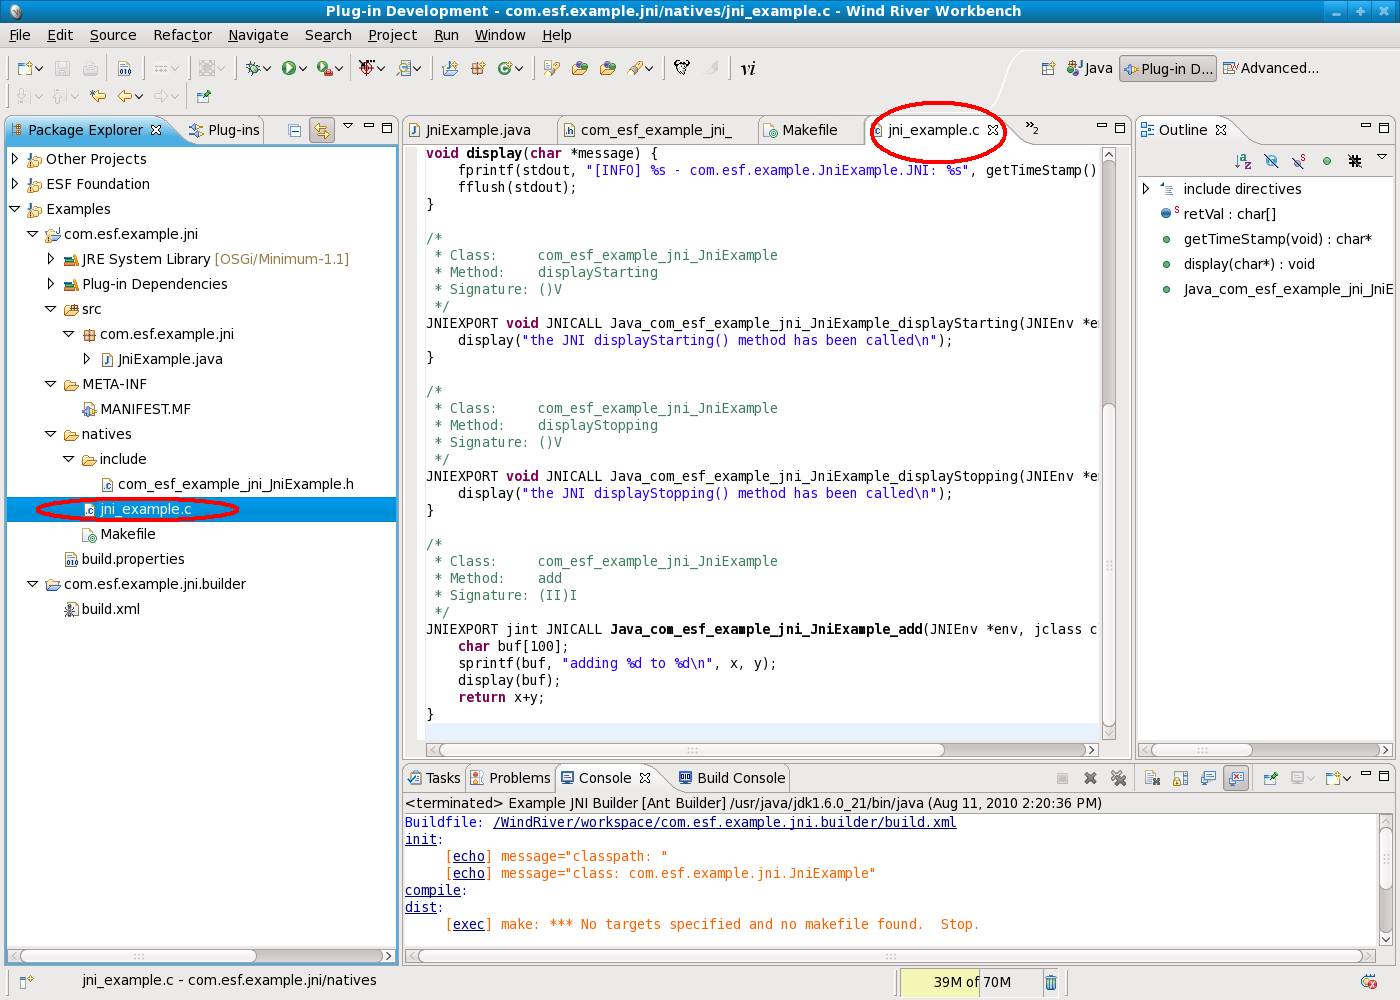
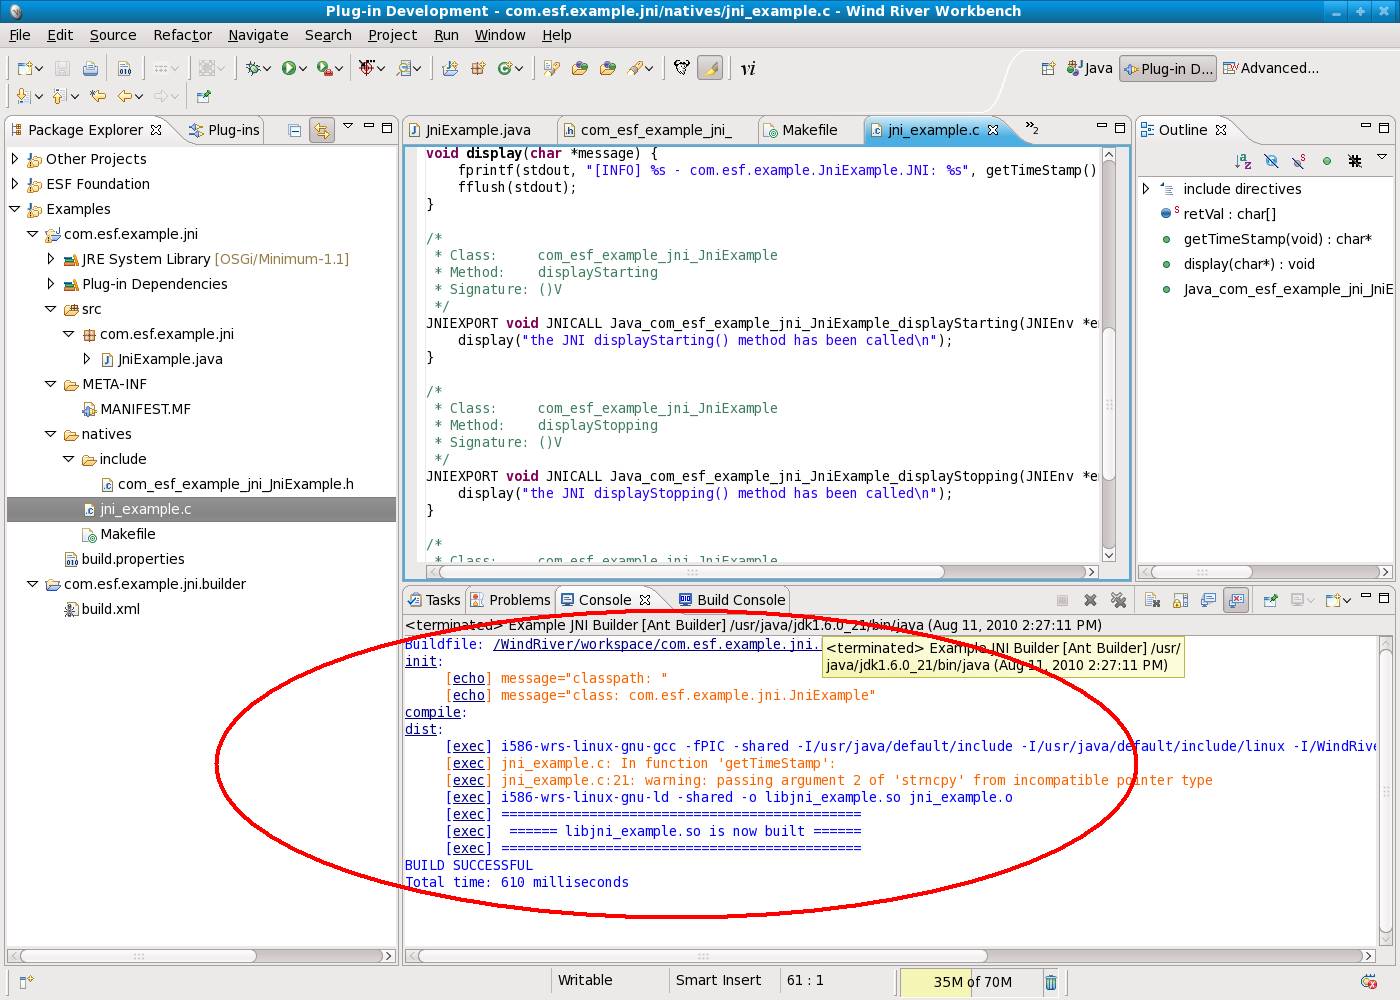
With the code copied into the project, your screen should be similar to the following screen capture.
The Project is now complete. You can do another clean at this point to force a clean build.
Again, the clean dialog box will open. Select only the com.esf.example.jni project and click ‘OK’.
This step will force a clean build. If you look at the Workbench console, you should see a message. It states the ‘libjni_example.so’ is now built indicating a successful build.
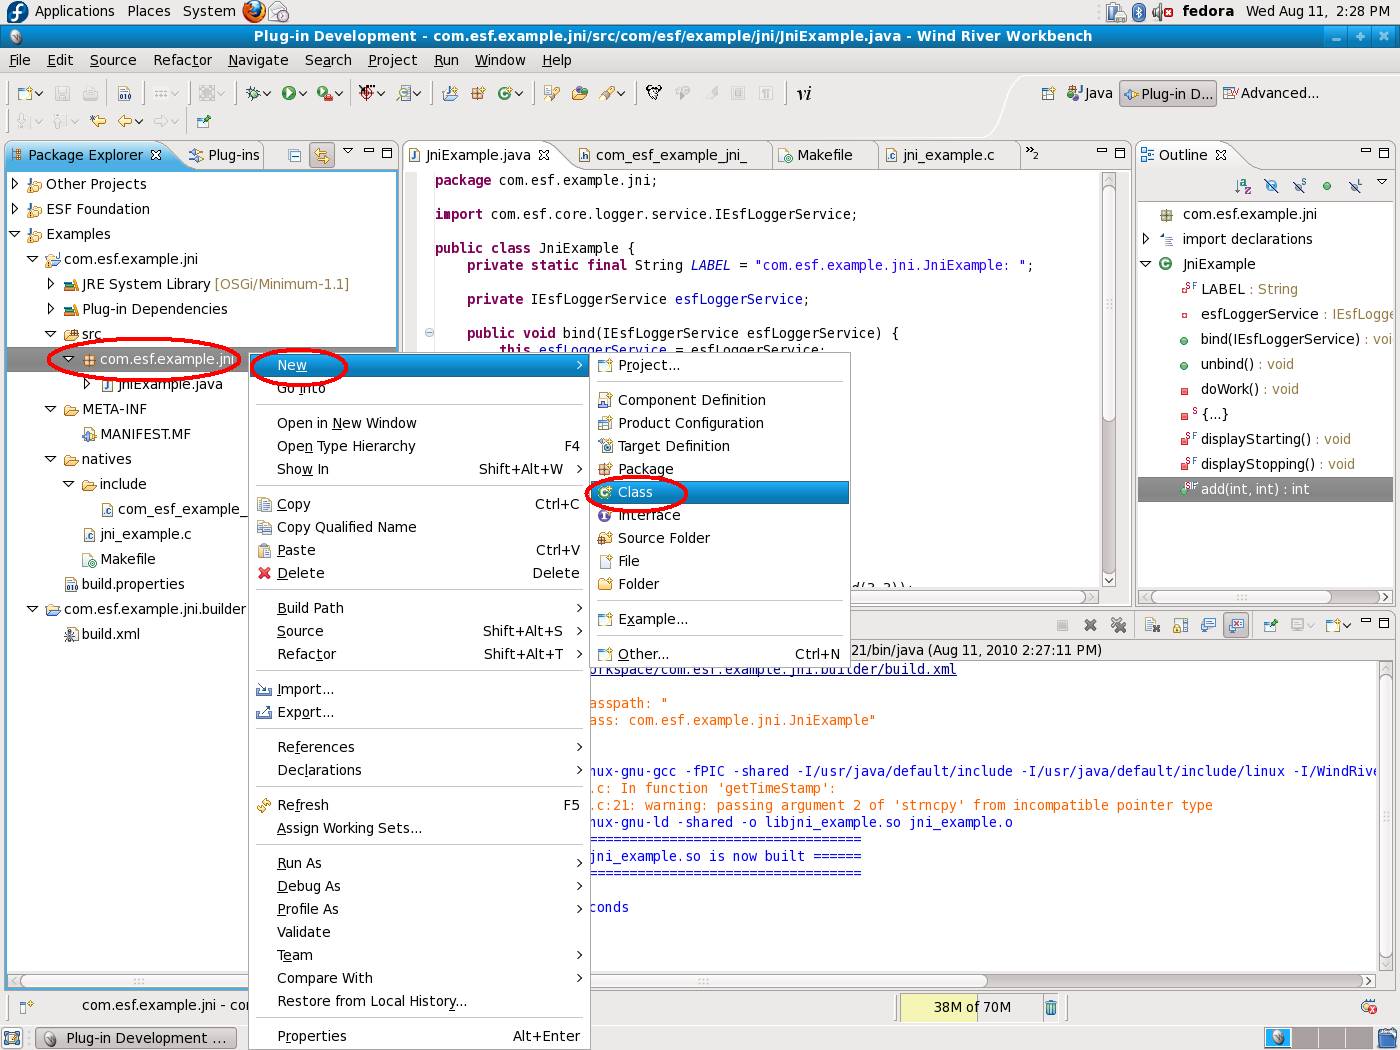
You still have some ESF work to do now that the JNI is built. Specifically, you need to create the Activator. Right-click the com.esf.example.jni package in the com.esf.example.jni project and select ‘New -> Class’.
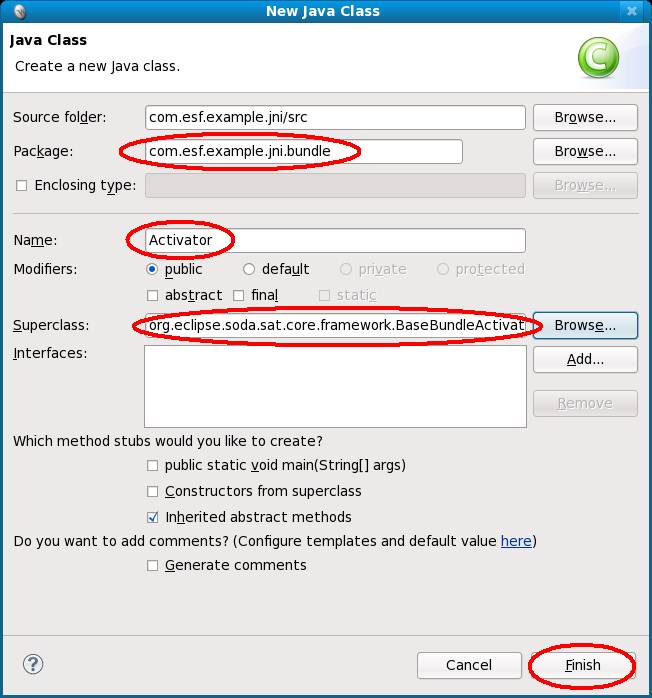
Change the Package name of the Activator to com.esf.example.jni.bundle, set the class name to ‘Activator, change the Superclass to org.eclipse.soda.sat.core.framework.BaseBundleActivator, and then click ‘Finish’.
Insert the following code for the complete class into the Activator.
package com.esf.example.jni.bundle;
import org.eclipse.soda.sat.core.framework.BaseBundleActivator;
import com.esf.core.logger.service.IEsfLoggerService;
import com.esf.example.jni.JniExample;
public class Activator extends BaseBundleActivator {
JniExample jniExample = null;
protected void activate() {
jniExample = new JniExample();
jniExample.bind(getIEsfLoggerService());
}
protected void deactivate() {
jniExample.unbind();
jniExample = null;
}
private IEsfLoggerService getIEsfLoggerService() {
return (IEsfLoggerService) getImportedService(IEsfLoggerService.SERVICE_NAME);
}
protected String[] getImportedServiceNames() {
return new String[] {
IEsfLoggerService.SERVICE_NAME
};
}
}
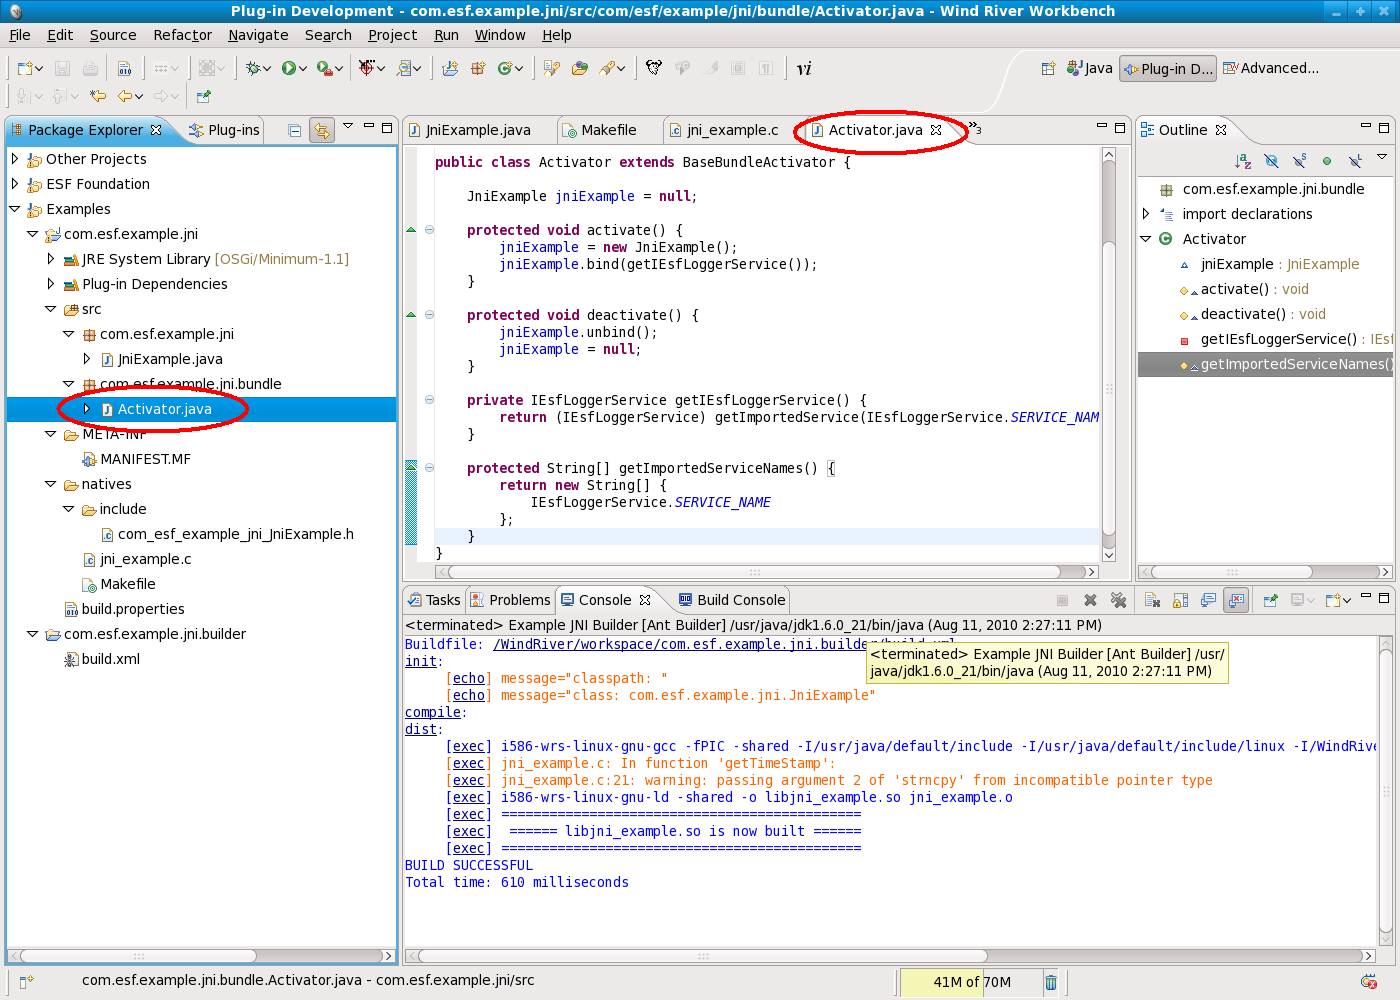
When complete, your screen should be similar to the following screen capture.
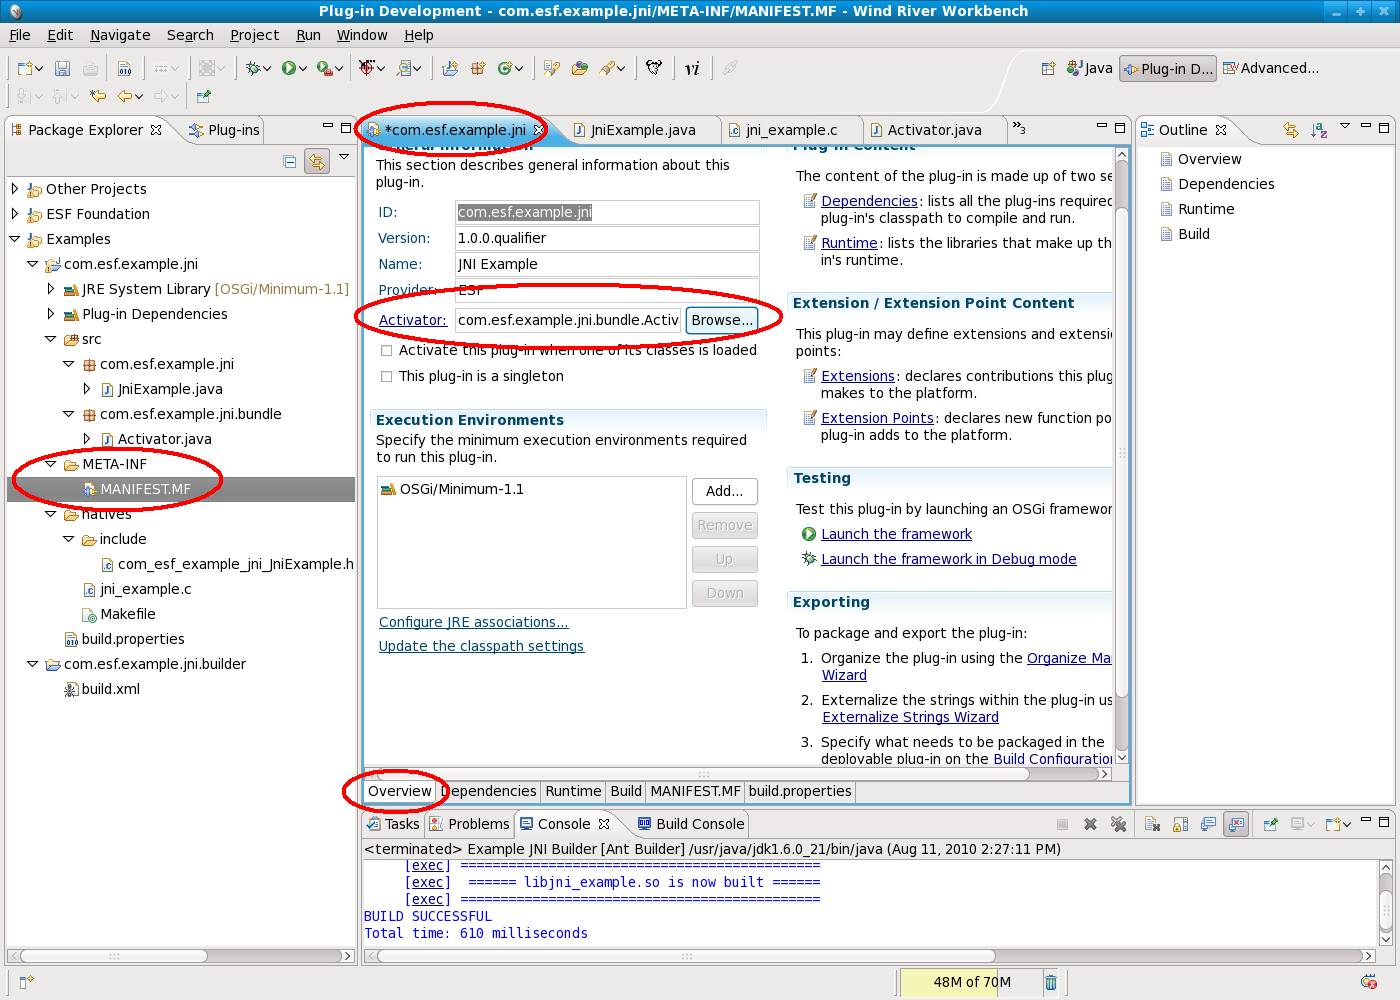
You now need to modify the MANIFEST.MF of the com.esf.example.jni project. Specify the Activotor by opening the MANIFEST.MF file in the META-INF directory of the com.esf.example.jni project. On the ‘Overview’ tab, set the Activator to com.esf.example.jni.bundle.Activator.
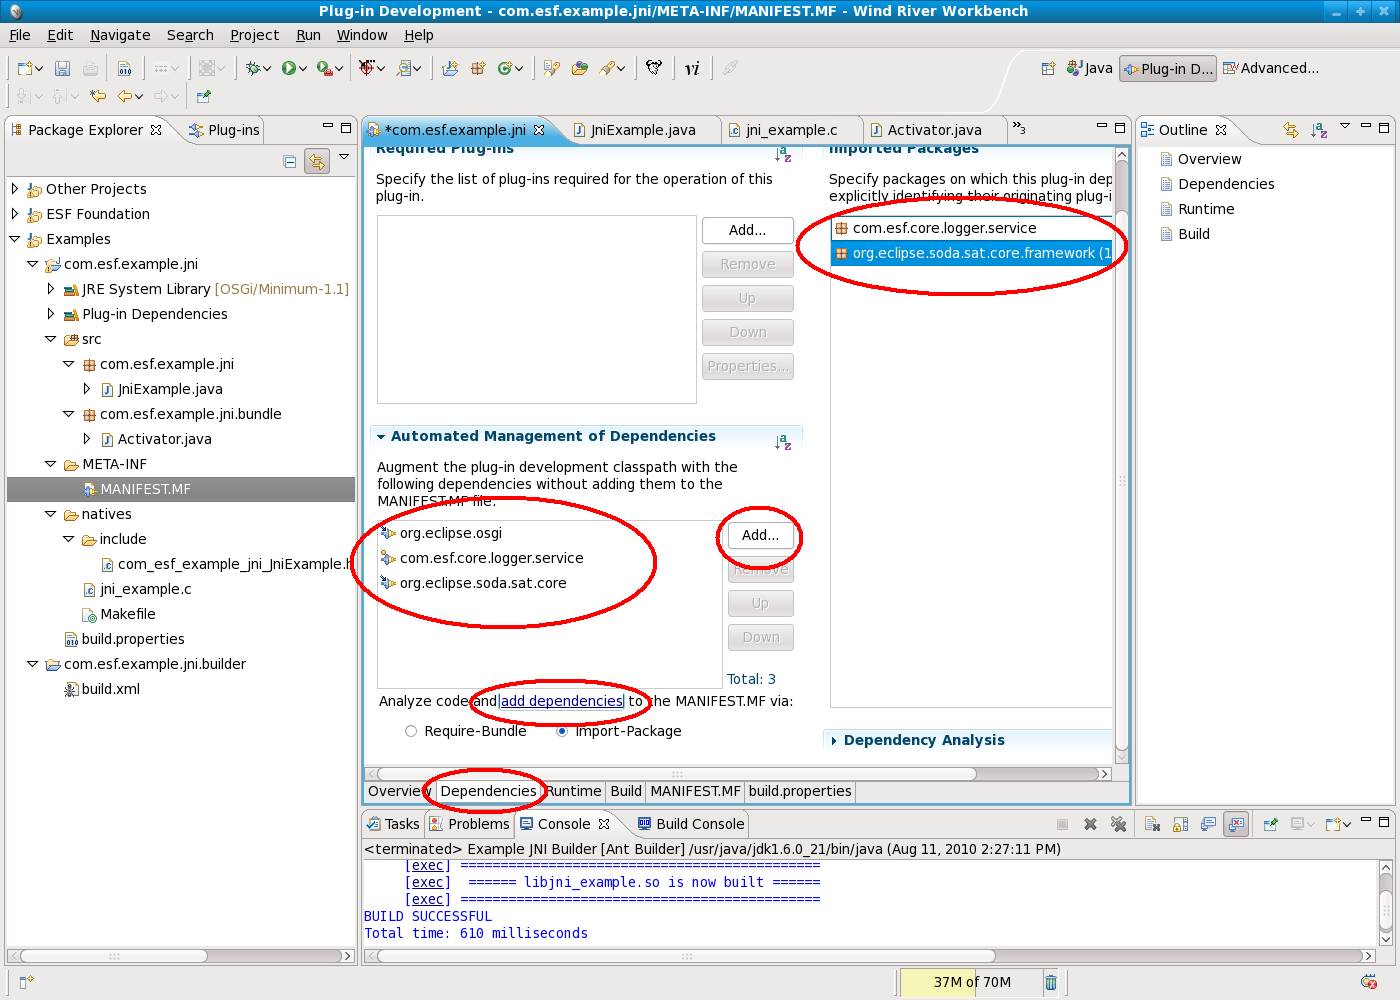
Next, you need to add the dependencies. Click the ‘Dependencies tab’ of the MANIFEST.MF and use the ‘Add…’ button to add the following bundles to the dependency list:
org.eclipse.osgi
com.esf.core.logger.service
org.eclipse.soda.sat.core
Once the bundles are added, use the ‘add dependencies’ link to add the dependencies to the list of ‘Imported Packages’ on the right side of the dependencies page.
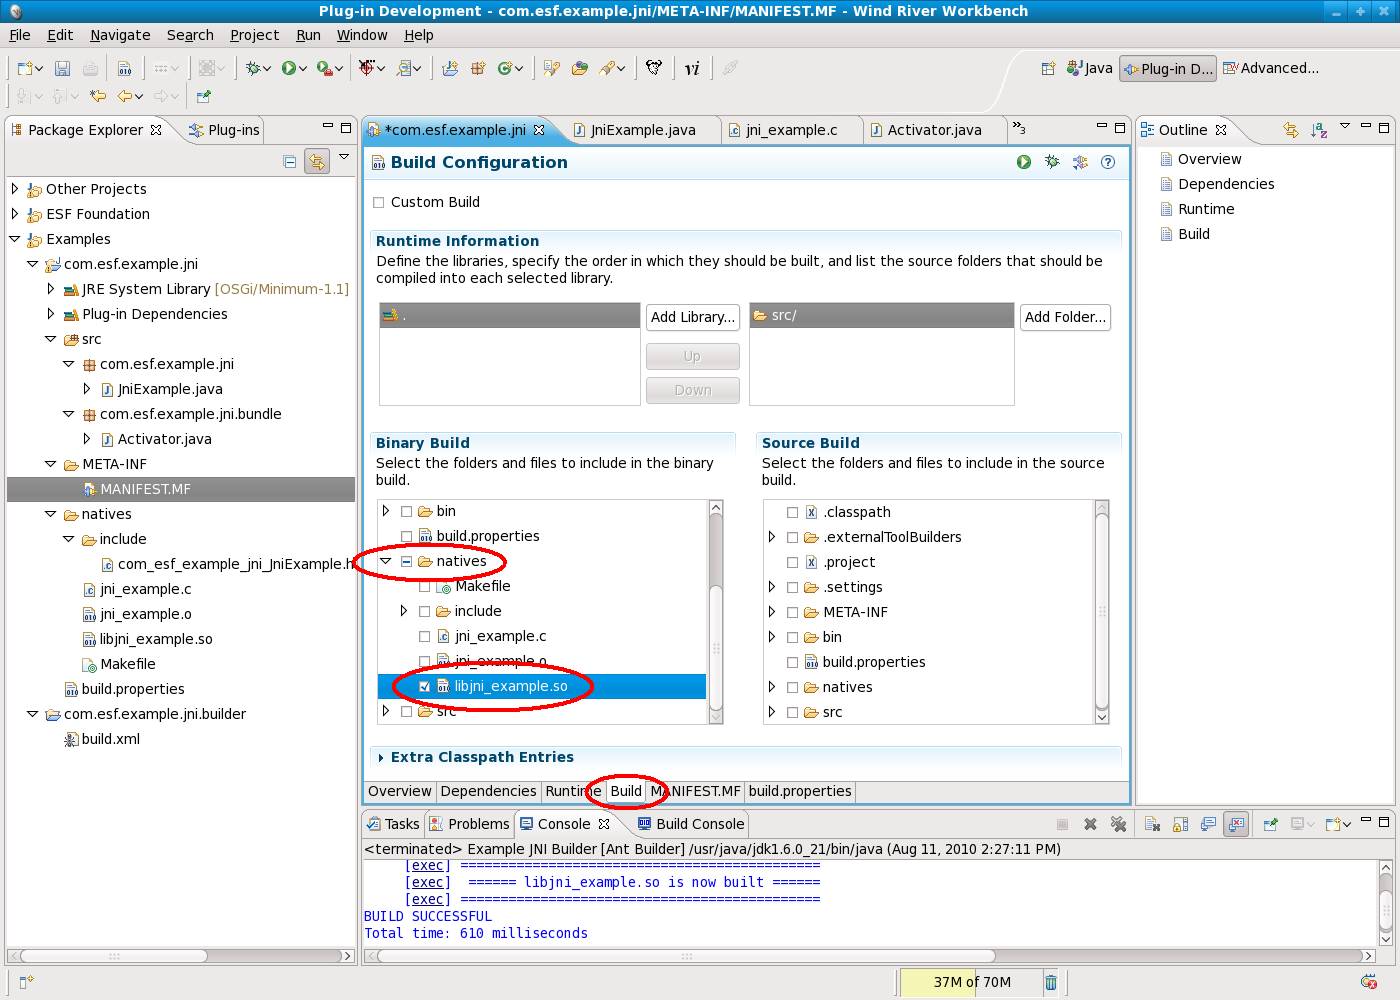
To make sure that the newly created libjni_example.so gets included in the jar file when you export it, click on the ‘Build’ tab of the manifest, expand the ‘natives’ directory, and select the libjni_example.so file.
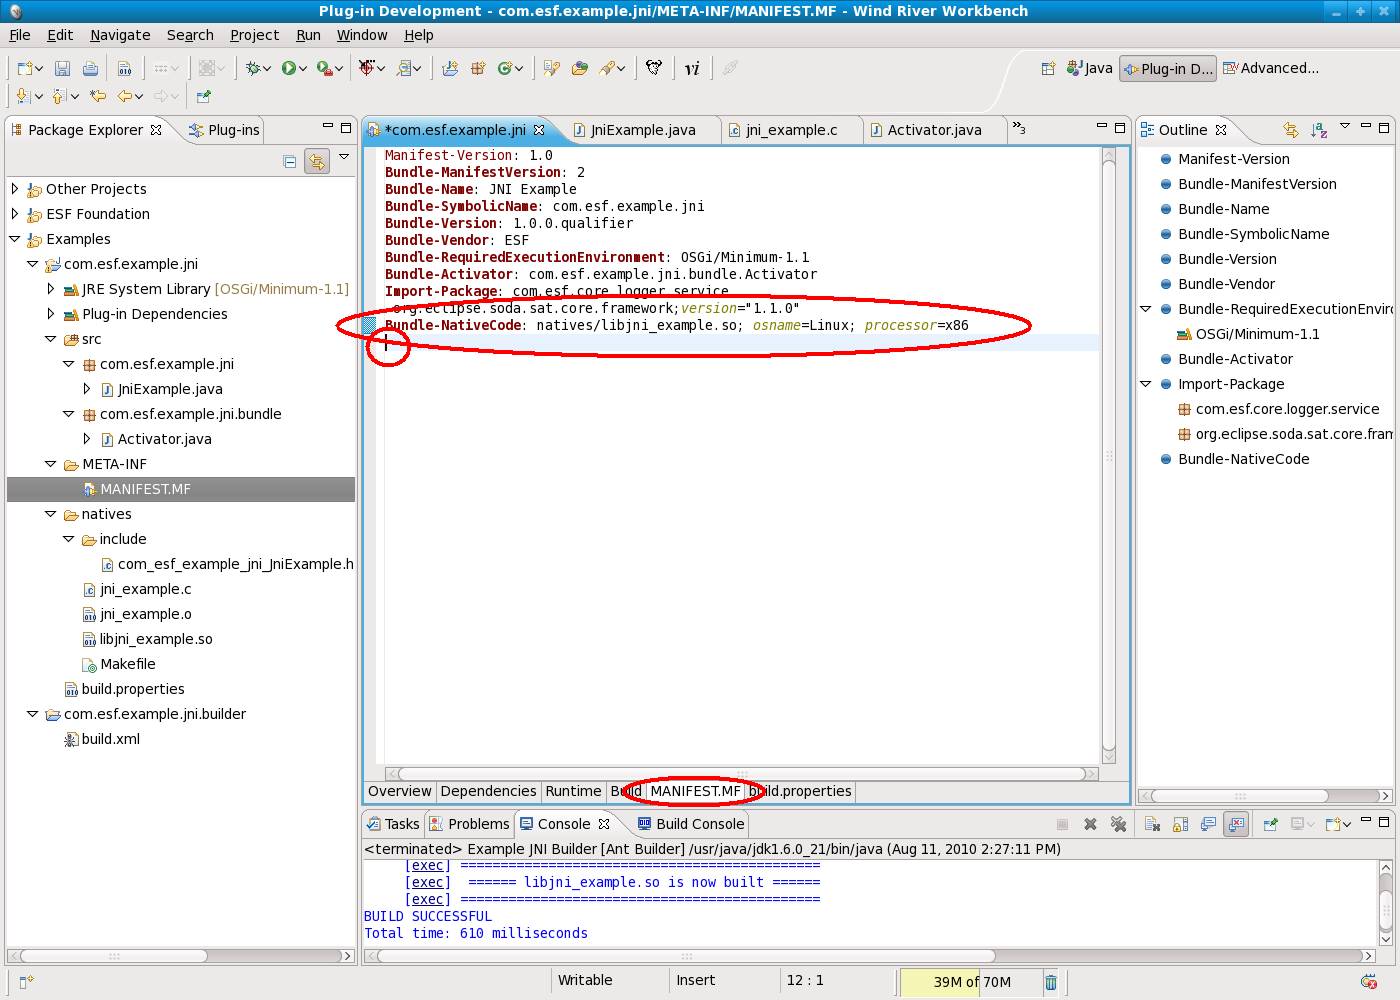
At runtime, OSGi needs to know where to find the shared object library. It can exist in the filesystem normally on the library path. However, you are embedding this .so in the jar file so you need to tell OSGi where to find it. You do this in the manifest. Begin by clicking the ‘MANIFEST.MF’ tab of the MANIFEST.MF file. Add the following single line to the end of the manifest.
Bundle-NativeCode: natives/libjni_example.so; osname=Linux; processor=x86
You are hand modifying the manifest in this case because Workbench doesn’t provide a tool for adding this line to the manifest. Whenever hand modifying the manifest, you should be aware of white space in the file. Like a Makefile, whitespace is important. There must be a single empty line signifying the end of the manifest. This is noted with the cursor location in the following screen capture. Make sure there is one empty line and no more. If using the down or right arrows moves the cursor from this location, you have extra whitespace that must be removed.
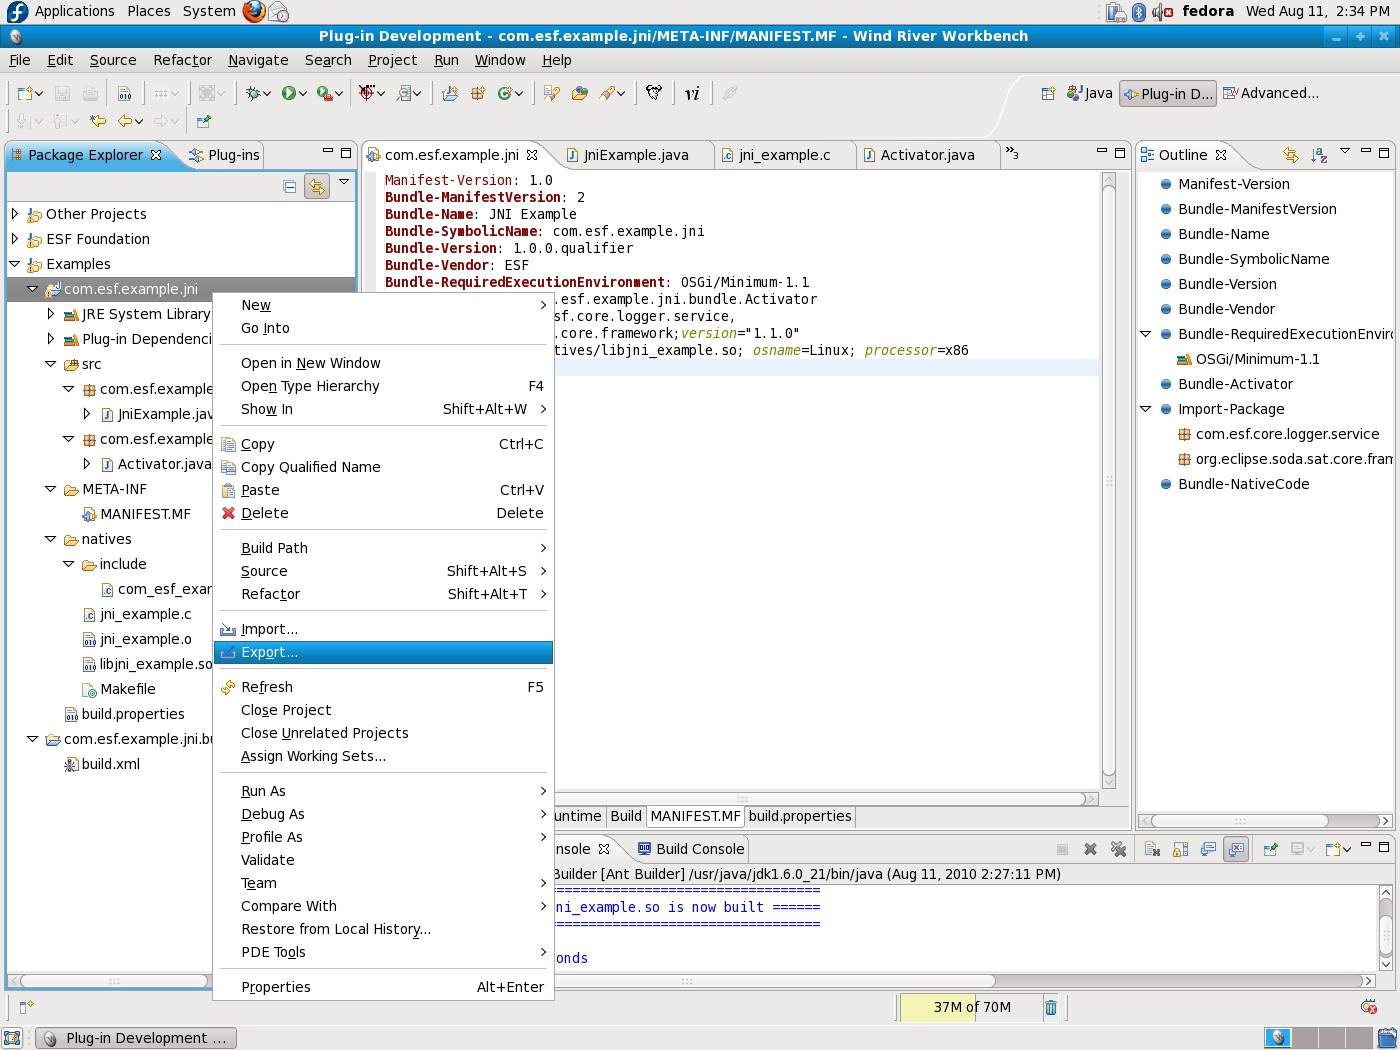
Save the manifest and all other files before proceeding. At this point, the project is complete, and you are ready to export it. Right-click the com.esf.example.jni project and select ‘Export’.
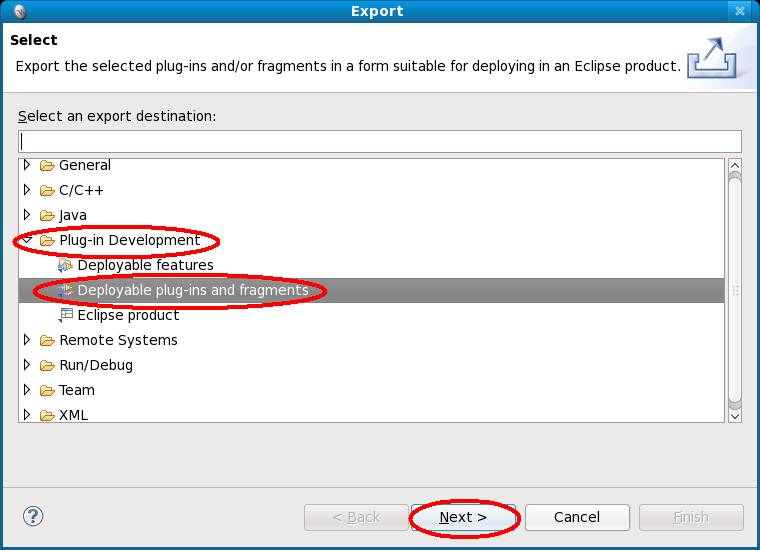
Expand ‘Plug-in Development’, select ‘Deployable plug-ins and fragments’, and then click ‘Next’.
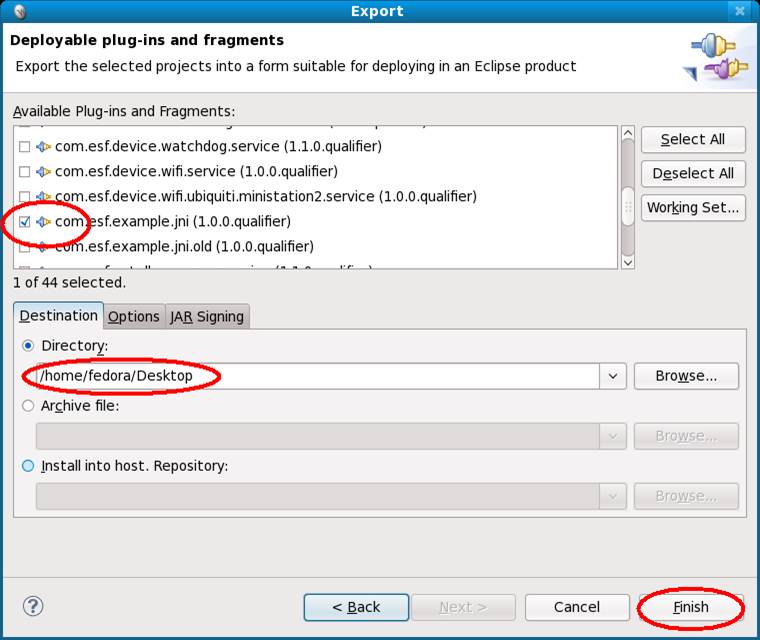
Make sure only this project is selected and the Directory to export to is /home/fedora/Desktop. Click ‘Finish’ to continue.
Once the project is exported, you can use scp to copy it to the target system. Open a console in Fedora and use the following command to copy it to the proper directory on the target.
scp /home/fedora/Desktop/plugins/com.esf.example.jni* root@[ip_address_of_target]:/opt/jvm/esf/dropins/
By default, on the target all bundles placed in the /opt/jvm/esf/dropins/ directory are started automatically at log level DUMP. If your target system is at 192.168.1.100, use the following scp command.
scp /home/fedora/Desktop/plugins/com.esf.example.jni* root@192.168.1.100:/opt/jvm/esf/dropins/
You may be prompted to add the host to the cache, type ‘yes’. Also, you will have to enter the root password of the target.
Once done, you can ssh into the target system to run the application. To ssh in, run the following command in the Fedora console.
ssh root@[ip_address_of_target]
For example, if your target is at 192.168.1.100, use the following ssh command.
ssh root@192.168.1.100
Again, you will be prompted for the root password. You shouldn’t be asked to add the host to the key cache because you have already done this. Now that you are logged into the target, you can start the application. Run the following commands.
cd /opt/jvm/esf
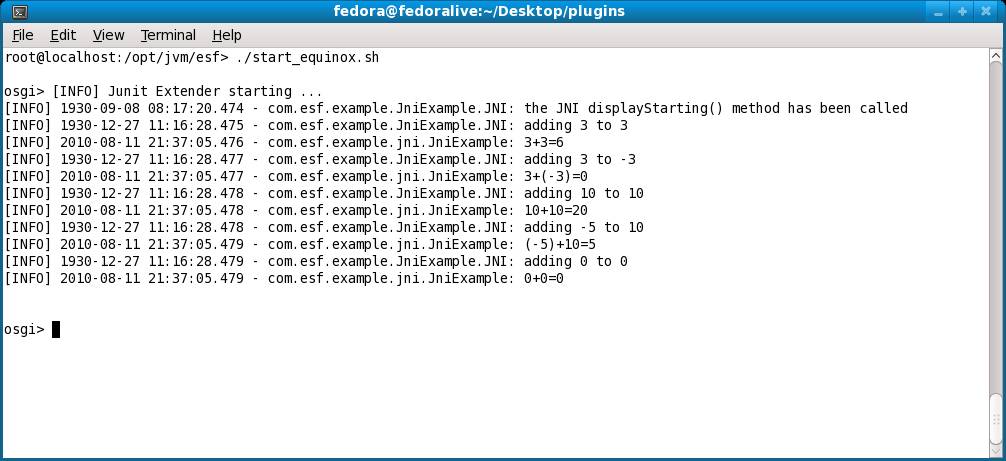
./start_equinox.sh
The output of these commands is shown in the following screen capture. Notice the JNI is exercised by your plugin.
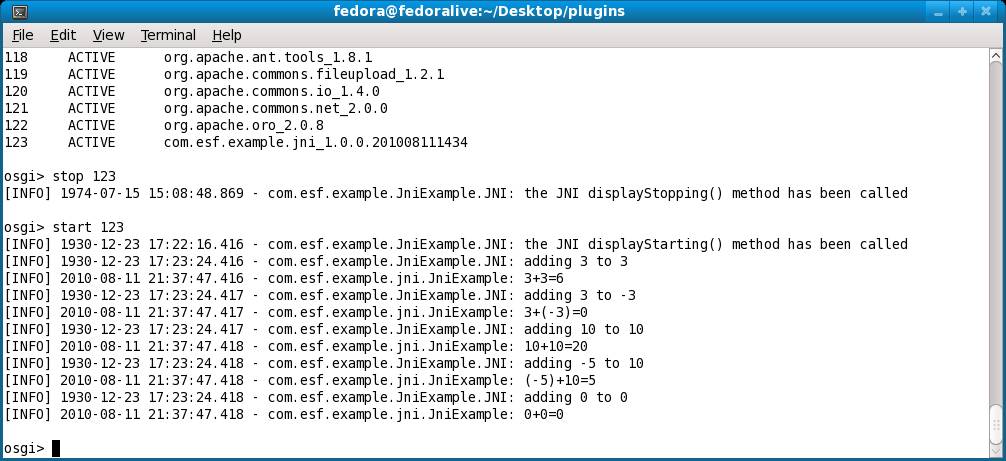
You can also stop and start the application within Equinox. By doing an ‘ss’ on the OSGi console, you will get a list of the bundles loaded within the environment. Notice in the following screen capture, this is bundle ID ‘123’. You can stop the bundle by running ‘stop 123’. This invokes the ‘stop’ method of the JNI, which outputs a message. You can then restart the bundle by running ‘start 123’. This command starts the application again by calling the bind() and then the functions in out JNI.
In conclusion, you were able to create a new bundle from scratch, write the Java code and Activator, modify the manifest, create the JNI, create the Ant Builder, build the binary, copying to the target, and run it in ESF. You can bypass the writing of the code by simply importing the projects here. For instructions on how to import the projects into your workspace, see this document.