
Version 2.0 - Legacy
Last: Vers.7.xx - 2022
- ESF Developers' Guide
- Introduction
- Getting Started
- ESF Code Examples
- Supplementary Documentation
- Resources


PART 2. GETTING STARTED
Setting up ESF Development Environment
ESF Development Environment
This document describes how to set up the development environment for Everyware® Software Framework (ESF) version 2. (For information on ESF version 1, see the ESF 1.4.1 Developer’s Guide.) The ESF v2 development environment consists of the following components:
· JVM (Java JDK SE 7)
· Eclipse IDE
· ESF Workspace setup
The ESF v2 development environment may be installed on a Windows, Linux, or Max OS. The setup instructions will be similar, depending on the unique characteristics of the three operating systems. Note, however, that “local emulation” of ESF code is only supported in Linux and Mac, not in Windows.
JVM Installation
Download and install JDK SE 7 from the following links as appropriate for your OS.
For Windows and Linux users, the JDK can be downloaded from the following link. Use the latest version of Java SE Development Kit and download the version appropriate for your system.
For additional information regarding the installation of Java 7 on all supported operating systems, see JDK 7 and JRE 7 Installation Guide.
Eclipse IDE
The Eclipse IDE is an open source development tool that consists of an integrated development environment (IDE) and a plug-in system for managing extensions.
Installing Eclipse
Before installing Eclipse, you should choose directory locations for the Eclipse install and its workspaces. NOTE: the following points should be kept in mind regarding Eclipse installs and workspaces:
· The directory location of the Eclipse workspaces should be chosen carefully. Once Eclipse is installed and workspaces are created, they should never be moved to another location in the file system.
· There may be multiple installs of Eclipse (of different or similar versions), and single instances of each install can be run simultaneously; but there should never be more that one instance of a specific install running at the same time (to avoid corruption to the Eclipse environment).
· Each workspace should be used with only one Eclipse install. You should avoid opening the workspace from more than one installation of Eclipse.
· For the purposes of this guide, only a single Eclipse installation will be covered.
Download the current distribution of Eclipse for your OS from the Eclipse website at http://www.eclipse.org/downloads/. Choose the “Eclipse IDE for Java EE Developers”.
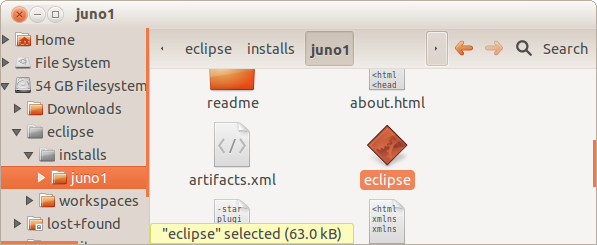
The zipped Eclipse file will be downloaded to the local file system and can be saved to a temporary location that can be deleted after Eclipse has been installed. After the file has been downloaded, it should be extracted to the Eclipse installs directory. The following screen capture shows the installation in Linux using an eclipse\installs\ directory. The Eclipse executable will then be found in the eclipse\installs\eclipse\ directory. This installation will be different depending on the operating system.
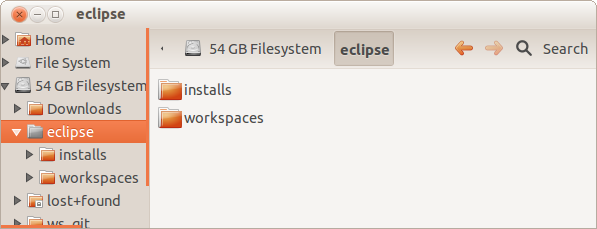
Because there may potentially be future Eclipse installs extracted into this location, before doing anything else rename the directory, such as to “eclipse\installs\juno1\”. Once you begin using this Eclipse install, it should not be moved or renamed later.
Installing mToolkit
An additional plugin, mToolkit, is needed to allow remote connectivity to an OSGi framework on an ESF-enabled target device. To install mToolkit into Eclipse, use the following steps:
· Download the mToolkit plugin in archive format from mtoolkit.tigris.org (look for the latest stable release under Download and Install, in zipped format).
· It is recommended to create an mToolkit directory under dropins in the Eclipse install location (path_to_eclipse/dropins/mToolkit).
· Copy the zip file to the new directory (path_to_eclipse/dropins/mToolkit).
· Extract the contents of the zip file in the mToolkit folder, which should result in a directory structure something like:
eclipse/dropins/mToolkit/eclipse/features
eclipse/dropins/mToolkit/eclipse/plugins
· Restart Eclipse. In the menu Window | Show View | Other, there should be an mToolkit | Frameworks option. If so, the plugin has been installed correctly.
Workspaces
Creating an Eclipse Workspace
Run Eclipse by clicking its executable in the install directory.
When Eclipse is run for the first time, a workspace needs to be created. A single workspace will contain all the Java code/projects/bundles, Eclipse configuration parameters, and other relevant files for a specific business-level product. If the Use this as the default option is selected, the workspace will become the default each time you run Eclipse.
If a workspace hasn’t already been defined or if you are creating a different workspace for a different development project, enter a new workspace name. The workspace should be named appropriate to the project/product being developed. Once you begin using this workspace, it should not be moved or renamed later.
Otherwise, select an existing workspace and click OK. After Eclipse is running, you can select the Eclipse menu File | Switch Workspace | Other to create or open a different workspace.
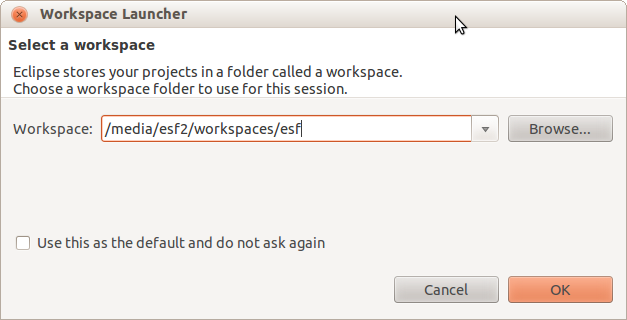
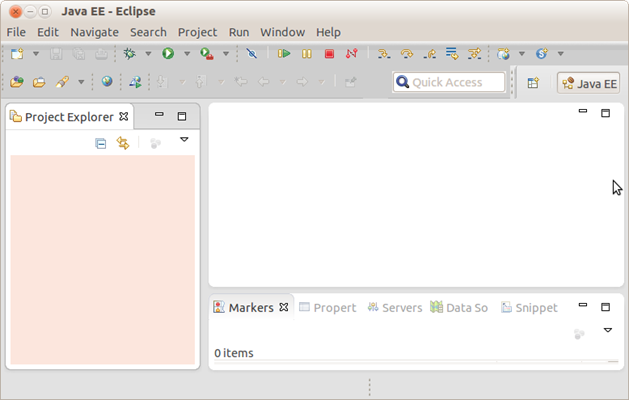
After the new workspace opens, click the Workbench icon to display the development environment.
Importing ESF User Workspace
To set up your ESF project workspace, you will need to download the ESF User Workspace archive from http://esfdownload.eurotech-inc.com/. This download requires the username and password obtained through the free ESF registration site at http://esf.eurotech.com.
From the Eclipse File menu, select the Import option. In the Import dialog box, expand the General heading, select Existing Projects into Workspace, and then click Next.
Now click the Select archive file option button and browse to the archive file, such as user_workspace_archive_2.0.0.zip.
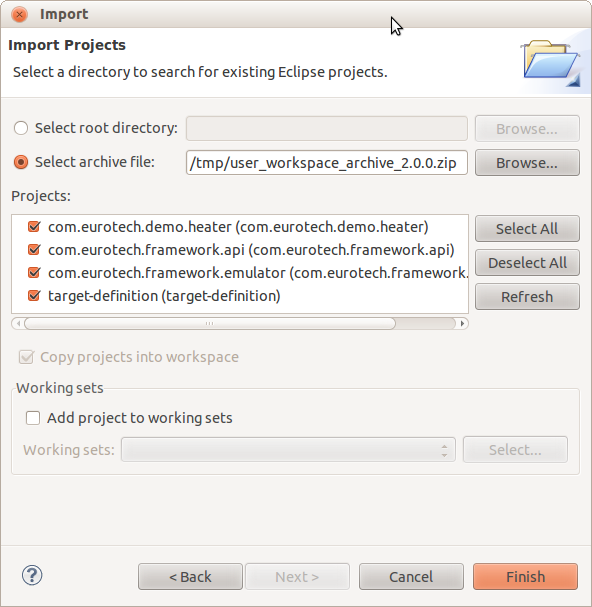
Finally, click Finish to import the projects. At this point, you should have four projects in your workspace. The four projects are
· com.eurotech.demo.heater – This is an example project that you can use as a starting point for creating your own bundle.
· com.eurtoech.framework.api – This is the core ESF API.
· com.eurotech.framework.emulator – This is the emulator project for running ESF within Eclipse (Linux/Mac only).
· target-definition – This is a set of required bundles that are dependencies of the APIs and ESF.
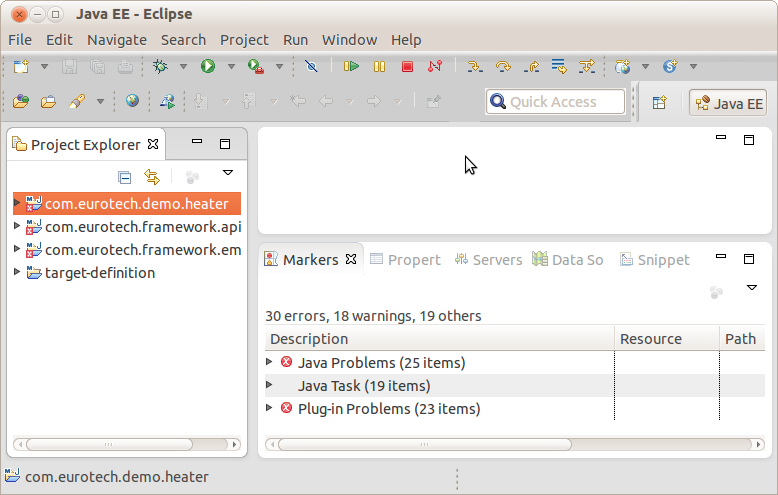
Eclipse will also report some errors at this point. See the next section to resolve those errors.
Workspace Setup
Click the arrow next to the target-definition project in the workspace and double-click esf-equinox_3.8.1.target to open it.

In the Target Definition window, click the link Set as Target Platform. This will reset the target platform and rebuild the ESF projects. After this step, there should be no remaining errors shown in the workspace.
At this point, you are ready to begin developing ESF-based applications for your target platform.