
Version 2.0 - Legacy
Last: Vers.7.xx - 2022
- ESF Developers' Guide
- Introduction
- Getting Started
- ESF Code Examples
- Supplementary Documentation
- Resources


PART 2. GETTING STARTED
Connecting to Everyware Cloud
· Run ESF on a Remote Target Device
· Configuring the Everyware Cloud Service
· Verify Device is Connected to Everyware Cloud
Overview
This section provides information on how to connect your ESF-enabled device to the Eurotech Everyware Cloud platform. In this example, you will learn how to
· Configure your device to connect to Everyware Cloud
· Verify your device connecting using the Everyware Cloud console
Prerequisites
· Have your Everyware Cloud account credentials handy. If you do not have an account, contact your Eurotech sales representative.
· Setting up ESF Development Environment
Connecting to the Cloud
With the development environment set up, you can either
· Configure the emulator to connect to the Everyware Cloud (see Local Emulation Mode)
· Configure a physical device running ESF to connect to the Everyware Cloud (see Run ESF on a Remote Target Device)
Local Emulation Mode
The ESF user workspace can be used in Eclipse in local emulation mode (Linux/OS X only; this feature is not currently supported under Windows). To deploy the code to a running system, see the section Run ESF on a Remote Target Device.
Run ESF in Emulator Mode
In the Eclipse workspace, locate the com.eurotech.framework.emulator project. Expand it to show the src/main/resources folder.
Right-click the correct ESF_Emulator_[OS].launch file, depending on which operating system you are running (where “[OS]” is “Linux” for a Linux system or “OSX” for a OS X system). In the context menu, select the Run as option, and select the ESF_Emulator_[OS]. This will start ESF running locally and will display a Console window in the bottom pane in Eclipse. The Console window will show the OSGi diagnostics as various bundles start and execute.
You should see output indicating ESF has started. There will also be some Exceptions in the log related to the cloud configuration not being set up. This output is shown below.

At this point, the ESF configuration web UI is available at http://127.0.0.1:8080/ (This starts a Web service on the local computer.). See the section Configuring the Everyware Cloud Service to set the Everyware Cloud credentials.
Run ESF on a Remote Target Device
ESF is designed to start automatically on remote target devices. With it preinstalled, simply power the device on and wait for it to fully boot. Once up and running, connect to it with a browser at http://ip_address, where “ip_address” should be replaced by the IP address of the device. For information on the default IP settings for various devices, see ESF Default Configuration.
Configuring the Everyware Cloud Service
Once connected to the ESF configuration web UI, you will need to log in. The default username/password is admin/admin. After logging in, you should see a window similar to the following (depending on whether you are connected to the emulator or a real device):
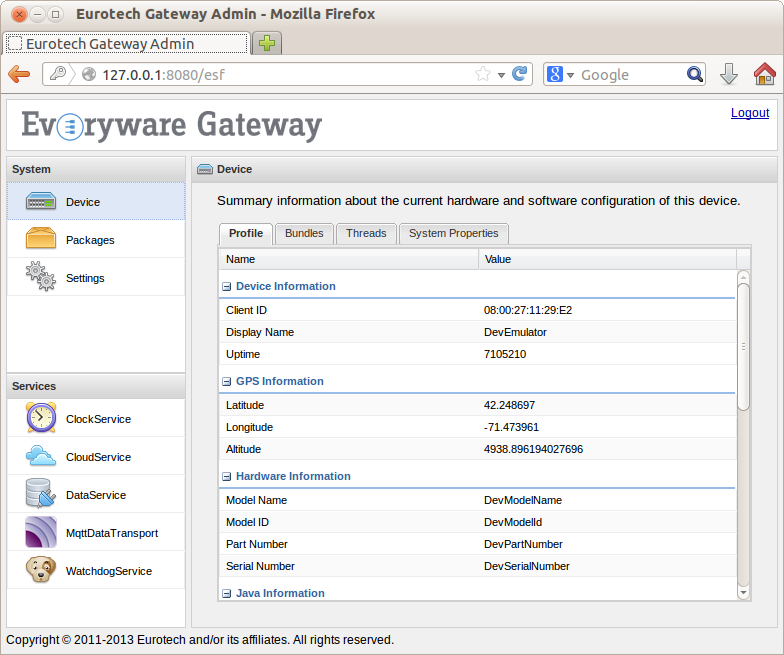
In the Services pane on the left, click the MqttDataTransport service. This will allow you to configure the Everyware Cloud credentials. The fields of most interest are
|
* broker-url: |
If you have a Sandbox account, use: mqtt://broker-sandbox.everyware-cloud.com:1883/ If you have a production account use: mqtt://broker-[account_name].everyware-cloud.com:1883/ |
|
* topic.context.account-name: |
your [account_name] |
|
* username: |
typically [account_name]_broker |
|
* password: |
the password for your user |
Once these credentials are set, click the Apply button near the top left of this configuration pane.
At this point, you have set the account credentials into the MqttDataTransport service, but you still need to tell the DataService to connect by default. Click the DataService service in the Services pane on the lower left of the browser window. For the connect.auto-on-startup parameter, select true and then click Apply. After this step, the MQTT client in ESF should automatically connect to the Everyware Cloud.
Verify Device is Connected to Everyware Cloud
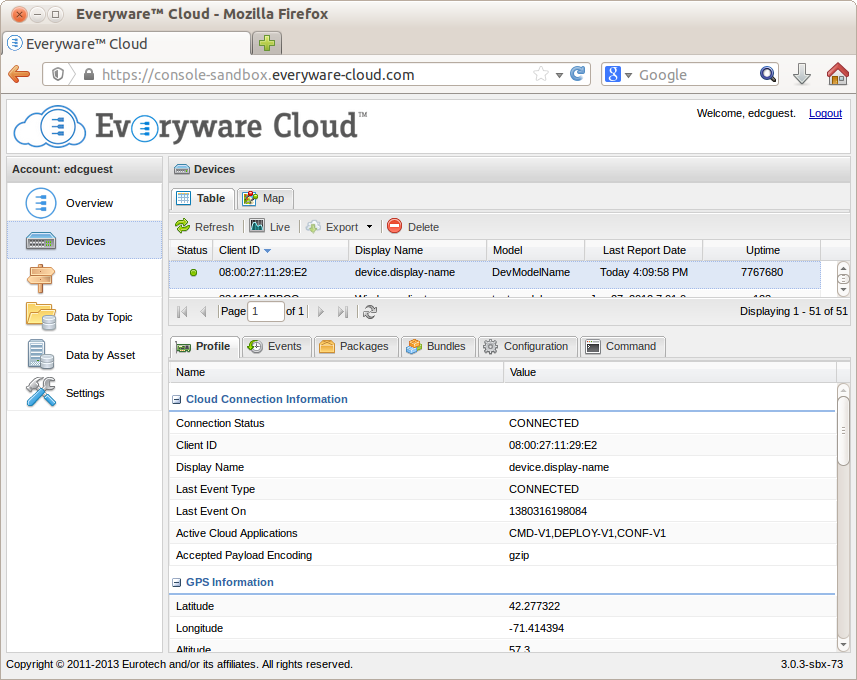
To verify the connection was made, open a browser window and connect to one of the following URLs, depending on whether you have a Sandbox account or a Production account, respectively:
Sandbox Account: https://console-sandbox.everyware-cloud.com/
Production Account: https://console.everyware-cloud.com/
After logging in using your account credentials, you should see a window like the following when you select the Devices option in the left pane. Note the device shows it is connected.
For more information on Eurotech’s Everyware Cloud, see the Everyware Cloud Developer's Guide. The Developer’s Guide has information on additional features and capabilities of the platform.