
Version 1.41 - 2013
Last: Vers. 5.xx - 2018
- ESF Developers' Guide
- Introduction
- Getting Started
- ESF Core/Foundation Code Examples
- ESF Protocol/Application Examples
- Supplementary Documentation
- Additional Eclipse and ESF Tooling
- Resources


PART 3. ESF CODE EXAMPLES
Serial Port Example
· Overview
Example
Overview
This example shows how to use a serial port within ESF. It will show how to write input and output streams to interface to another serial device. In this case, we will use a terminal emulator on another PC to validate the example project.
In this example, you will learn how to
Create and deploy a project that uses a serial port
Prerequisites
· Integrating ESF Tooling and Projects into Eclipse
or
· Installing ESF Tooling into Wind River Workbench
and
· Hello World Using the ESF Log Service
Serial Port Example
This how-to explains how to open a serial port in ESF, read from the port, and write to the port. The example uses a serial port connection to a separate host PC. Many newer PCs do not have serial ports. If this is the case, use a USB-to-Serial adapter that is supported on your OS.
You need a way to tell how to access your serial ports on the target system. You can download the (com.esf.tooling.target.device.serial.detector_1.0.0.201205011430.jar) prebuilt bundle to do exactly this in ESF. ESF supports ‘native’ serial ports (those attached to ‘real’ UARTs). These ports are identified as /dev/ttyS* in Linux. They can be discovered via the ISystemManagerService in ESF. There is also support for dynamic USB-based serial ports in ESF. Some Eurotech hardware platforms may have USB-to-Serial ports internally as well. By placing the prebuilt jar into the /opt/jvm/esf/dropins/ directory and starting ESF, you should see an output similar to the following.
[INFO] 2010-08-02 16:09:36.906 - com.esf.tooling.target.device.serial.detector.SerialDetector: new USB-to-Serial port found: /dev/ttyUSB0 at USB port address 4-2.1
In this case, the application was run on a Helios. Note the device node (4-2.1) is shown, as well as the ‘physical USB port number’. This information is tracked in ESF even though USB is dynamic, while the devices attached to the USB ports are probably not. For example, say you also have an external USB-to-Serial Port attached to the Helios. We can actually attach this now and see the output of the USB detector tool.
[INFO] 2010-08-02 16:10:42.884 - com.esf.tooling.target.device.serial.detector.SerialDetector: new USB-to-Serial port found: /dev/ttyUSB1 at USB port address 2-1
This time the USB-to-Serial port is at /dev/ttyUSB1. However, there is no way to guarantee that this will be the same device name on the next boot. It may be detected the next time as /dev/ttyUSB0, and the ‘native’ port could show up at /dev/ttyUSB1. If this occurs, the application software running on this device would now be talking to the wrong devices. The device nodes in Linux have switched, but the physical devices attached to those ports have not. By tracking the USB ports in ESF, we have a mechanism to tie the application software to the physical USB port regardless of what device node it is at on any given boot.
The Serial Detector tool code is outside the scope of this how-to. However, if you are interested in the code you can download it here. There are two key points in the software. First, the ISystemManagerService is used to get the list of ‘native’ serial ports. In the case of the Helios, there is no output because the Helios has only one serial port, which is internally a USB-to-Serial device. ESF detects this serial port using the IUsb2SerialManagerService. It registers itself as a listener. Then every time a device is attached or removed, it is displayed.
Using the serial port detected in the previous example, we can begin by creating a new Plug-in Project in Eclipse. If you need a refresher on this step, you can revisit it here. The basic information on the project is
· Project (bundle) Name
1. com.esf.example.serial
· Imported Services (to be added to the Automated Management of Dependencies list in the Eclipse Manifest Editor)
1. org.eclipse.osgi
2. org.eclipse.soda.sat.core
3. com.esf.core.logger.service
4. org.soda.steptone.core
5. com.esf.device.serial.comm.service
6. com.esf.device.usb.manager.usb2serial.service
7. com.esf.core.system.manager.service
· Activator Class Name (with Package Name)
1. com.esf.example.serial.bundle.Activator
· Implementation Class Name (with Package Name)
1. com.esf.example.serial.SerialExample
The following is the implementation class (com.esf.example.serial.SerialExample) source.
package com.esf.example.serial;
import org.soda.stepstone.core.Delay;
import org.soda.stepstone.core.IWork;
import org.soda.stepstone.core.Worker;
import com.esf.core.logger.service.IEsfLoggerService;
import com.esf.core.system.manager.service.ISystemManagerService;
import com.esf.device.serial.comm.service.BaudRate;
import com.esf.device.serial.comm.service.BitsPerByte;
import com.esf.device.serial.comm.service.ISerialCommAquisitionService;
import com.esf.device.serial.comm.service.ISerialCommService;
import com.esf.device.serial.comm.service.Parity;
import com.esf.device.serial.comm.service.SerialCommInputStream;
import com.esf.device.serial.comm.service.SerialCommOutputStream;
import com.esf.device.serial.comm.service.SerialMode;
import com.esf.device.serial.comm.service.StopBits;
import com.esf.device.usb.manager.usb2serial.service.IUsb2SerialManagerService;
import com.esf.device.usb.manager.usb2serial.service.Usb2SerialListener;
public class SerialExample implements Usb2SerialListener {
private static final String LABEL = "com.esf.example.serial.SerialExample: ";
private static final String PORT_NAME = "4-2.1"; //this is physical USB port identifier on the Helios.
// PORT_NAME can also be a Linux device such as "/dev/ttyUSB0"
// or "/dev/ttyS0" if these device names are known
private IEsfLoggerService esfLoggerService;
private IUsb2SerialManagerService usb2SerialManagerService;
private ISerialCommAquisitionService serialCommAquisitionService;
private ISerialCommService serialCommService;
private Worker worker;
private String serialPort;
private SerialCommOutputStream os;
private SerialCommInputStream is;
public void bind(IEsfLoggerService esfLoggerService, ISystemManagerService systemManagerService, IUsb2SerialManagerService usb2SerialManagerService, ISerialCommAquisitionService serialCommAquisitionService) {
this.esfLoggerService = esfLoggerService;
this.usb2SerialManagerService = usb2SerialManagerService;
this.serialCommAquisitionService = serialCommAquisitionService;
this.usb2SerialManagerService.registerListener(this);
worker = new Worker("serialPortWorker", new IWork() {
public boolean doWork() throws InterruptedException {
return doPollWork();
}
});
worker.start();
}
public void unbind() {
if(worker != null) {
worker.stop();
worker = null;
}
try {
if(os != null) {
os.flush();
os.close();
os = null;
}
} catch(Exception e) {
e.printStackTrace();
}
try {
if(is != null) {
is.close();
is = null;
}
} catch(Exception e) {
e.printStackTrace();
}
if(serialCommService != null) {
serialCommAquisitionService.releaseSerialCommService(serialCommService);
serialCommService = null;
}
usb2SerialManagerService.unregisterListener(this);
serialCommAquisitionService = null;
usb2SerialManagerService = null;
esfLoggerService = null;
}
private String getSerialPort() {
if(PORT_NAME.indexOf("/dev/ttyS") > -1) {
return PORT_NAME;
} else if(PORT_NAME.indexOf("/dev/ttyUSB") > -1) {
while(true) {
String[] ports = usb2SerialManagerService.getDeviceUsbPorts();
for(int i=0; i<ports.length; i++) {
if(usb2SerialManagerService.getSerialPort(ports[i]).compareTo(PORT_NAME) == 0) {
return PORT_NAME;
}
}
esfLoggerService.logInfo(LABEL + "waiting for serial port " + PORT_NAME + " to be detected");
Delay.seconds(1);
}
} else {
//wait for the serial port to show up via the usb2SerialDeviceAttached method
while(usb2SerialManagerService.getSerialPort(PORT_NAME) == null) {
esfLoggerService.logInfo(LABEL + "waiting for serial port at USB port " + PORT_NAME + " to be detected");
Delay.seconds(1);
}
return usb2SerialManagerService.getSerialPort(PORT_NAME);
}
}
private boolean doPollWork() {
if(serialPort == null) {
serialPort = getSerialPort();
try {
serialCommService = serialCommAquisitionService.getSerialCommService(serialPort, true);
serialCommService.setBaudRate(BaudRate.B115200);
serialCommService.setBitsPerByte(BitsPerByte.Bits8);
serialCommService.setParity(Parity.None);
serialCommService.setStopBits(StopBits.Bits1);
serialCommService.setMode(SerialMode.FullDuplexNoHandshake);
os = serialCommService.getOutputStream();
is = serialCommService.getInputStream();
esfLoggerService.logInfo(LABEL + "serial port: " + serialPort + " now configured at 115200 8N1");
} catch(Exception e) {
esfLoggerService.logError(LABEL + "failed to configure the serial port");
e.printStackTrace();
}
}
try {
StringBuffer readBuffer = new StringBuffer();
int c;
while((c = is.read()) != -1) {
if(c != 10 && c != 13) {
readBuffer.append((char)c);
} else {
break;
}
}
String line = readBuffer.toString();
if(line != null) {
if(line.toLowerCase().trim().compareTo("hello") == 0) {
os.write("Hello yourself!\r\n".getBytes());
os.flush();
} else if(line.toLowerCase().trim().compareTo("what is your name?") == 0) {
os.write("My name is helios.\r\n".getBytes());
os.flush();
} else if(line.toLowerCase().trim().compareTo("what do you run?") == 0) {
os.write("I run ESF.\r\n".getBytes());
os.flush();
} else if(line.toLowerCase().trim().compareTo("") == 0) {
//no-op
} else {
//esfLoggerService.logWarning(LABEL + "received: " + line);
os.write("That does not compute - Please ask a valid question or say hello.\r\n".getBytes());
os.flush();
}
}
} catch(Exception e) {
e.printStackTrace();
}
Delay.milliseconds(500);
return true;
}
public void usb2SerialDeviceAttached(String vendor, String product, String usbPortAddress, String serialPort) {
esfLoggerService.logInfo(LABEL + "new USB-to-Serial port found: " + serialPort + " at USB port address " + usbPortAddress);
}
public void usb2SerialDeviceDetached(String vendor, String product, String usbPortAddress, String serialPort) {
esfLoggerService.logInfo(LABEL + "new USB-to-Serial port removed: " + serialPort + " at USB port address " + usbPortAddress);
}
}
Let’s break the code into the following sections to explain:
· bind()/unbind()
· getSerialPort()
· doPollWork()
· usb2SerialDeviceAttached()
· usb2SerialDeviceDetached()
The bind() and unbind() methods are pretty standard. The bind() method binds the OSGi services that are available to this bundle. We also register our USB Manager Service listener to listen for USB-to-Serial device attachments and detachments in case we want to use a USB-to-Serial device. Finally, we start the worker thread to do our serial port work.
The getSerialPort() method waits until the serial port we are interested in is available. The serial port is defined by the ‘private static final String PORT_NAME’. This definition must be changed based on your project and platform. In this case, it is defined as ‘4-2.1’ meaning there is a USB-to-Serial device attached on USB port 4-2.1. This port was found using the SerialDetector tool earlier. Note that this example only applies to the built-in serial port on the Helios product. Use the correct port for your system.
Valid options here would also be
· /dev/ttyUSB1 – which would use the same port (but is dangerous because we don’t know for certain it will enumerate to here)
· /dev/ttyUSB0 – which would use the Helios on-board serial port (but is dangerous because we don’t know for certain it will enumerate to here)
· 4-2.1 – which would use the Helios on-board serial port
· /dev/ttyS0 – this could be used on a product platform with a built-in native serial port (not USB)
Once the device can be detected, which takes some time if it is a USB device because the USB Manager has to come online, the device node of the serial port is passed back to the caller. This step could not be in the bind() because it would pause execution of the Bootstrap Service. This pause would cause the system to hang since the Bootstrap Service is waiting for all Activators to finish execution. However, this activator would not finish until the USB Manager was fully online. A deadlock situation will result, and the system will never continue.
The doPollWork() method ensures the serial port has been opened and opens it if it has not. It also gets the input and output streams. These streams are used to do some simple I/O.
The usb2SerialDeviceAttached and usb2SerialDeviceDetached methods show how to get called back by the USB Manager when a USB-to-Serial device is detected. In this case, we only display a message. But, this can make dynamic systems much more efficient to run because polling may not be necessary. These methods are only here to display a log message and are otherwise unused in this example.
The Activator is straightforward and shown by the following code.
package com.esf.example.serial.bundle;
import org.eclipse.soda.sat.core.framework.BaseBundleActivator;
import com.esf.core.logger.service.IEsfLoggerService;
import com.esf.core.system.manager.service.ISystemManagerService;
import com.esf.device.serial.comm.service.ISerialCommAquisitionService;
import com.esf.device.usb.manager.usb2serial.service.IUsb2SerialManagerService;
import com.esf.example.serial.SerialExample;
public class Activator extends BaseBundleActivator {
private SerialExample serialExample;
protected void activate() {
serialExample = new SerialExample();
serialExample.bind(getIEsfLoggerService(), getISystemManagerService(), getIUsb2SerialManagerService(), getISerialCommAquisitionService());
}
protected void deactivate() {
serialExample.unbind();
serialExample = null;
}
private IEsfLoggerService getIEsfLoggerService() {
return (IEsfLoggerService) getImportedService(IEsfLoggerService.SERVICE_NAME);
}
private ISystemManagerService getISystemManagerService() {
return (ISystemManagerService) getImportedService(ISystemManagerService.SERVICE_NAME);
}
private IUsb2SerialManagerService getIUsb2SerialManagerService() {
return (IUsb2SerialManagerService) getImportedService(IUsb2SerialManagerService.SERVICE_NAME);
}
private ISerialCommAquisitionService getISerialCommAquisitionService() {
return (ISerialCommAquisitionService) getImportedService(ISerialCommAquisitionService.SERVICE_NAME);
}
protected String[] getImportedServiceNames() {
return new String[] {
IEsfLoggerService.SERVICE_NAME,
ISystemManagerService.SERVICE_NAME,
IUsb2SerialManagerService.SERVICE_NAME,
ISerialCommAquisitionService.SERVICE_NAME
};
}
}
With the Activator implemented and the base implementation class in place, we must remember to set the Activator in the manifest and add the required dependencies to the manifest.
Finally, we can run the example. Connect a crossover null modem serial cable to the USB-to-Serial adapter that has been inserted into USB port 4-2.1 of the Helios. Make the appropriate changes for your system. Plug the other end of the cable into a PC that can run a terminal emulator (HyperTerminal in this case. Use minicom on Linux). The following section describes the steps using the Windows operating system. If you are using Linux, skip to the Linux section.
Terminal Emulator - Windows
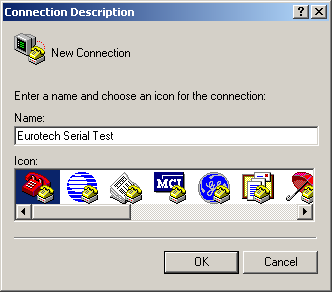
Go to ‘Start -> Programs -> Accessories -> Communications -> HyperTerminal’. (You can also use TeraTerm or PuTTY if your version of Windows doesn’t include HyperTerminal.) Give the connection a name and click ‘OK’.
Select the COM port you are using on your PC. If you are unsure, look at your Windows Device Manager for more details on what port to use. Once selected, click ‘OK’ to continue.

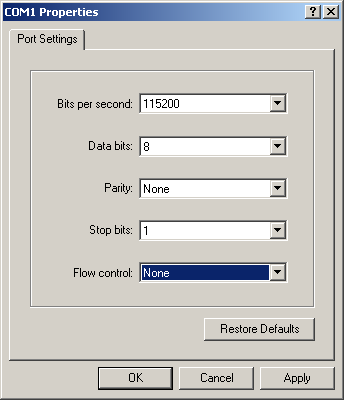
Set the parameters as shown and click ‘OK’.
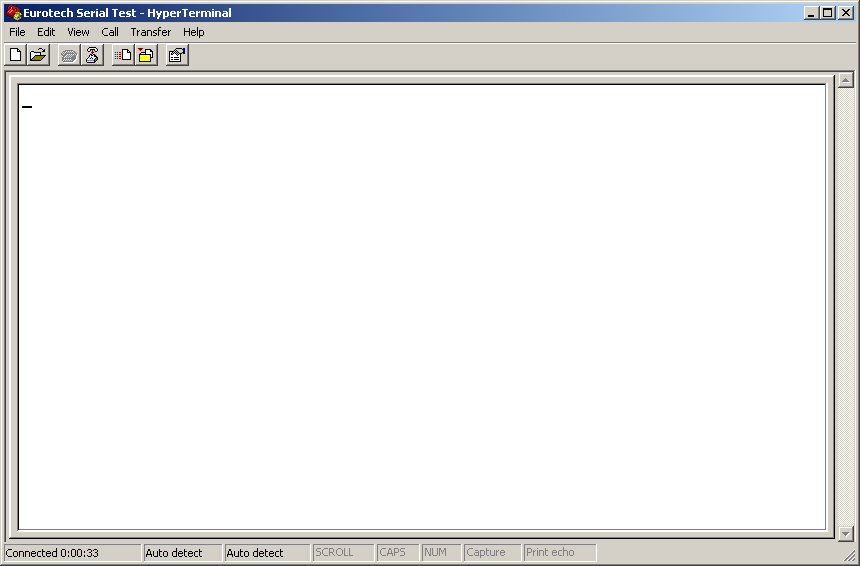
The program will display an indication that your connection is established.
Terminal Emulator - Linux
In Linux you should use minicom to connect to the remote serial device. Run minicom at the console.
minicom -s
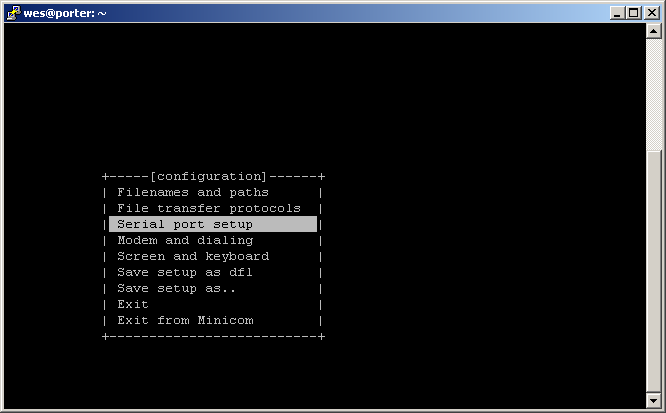
Select ‘Serial port setup’ using the arrow keys and press <ENTER>.
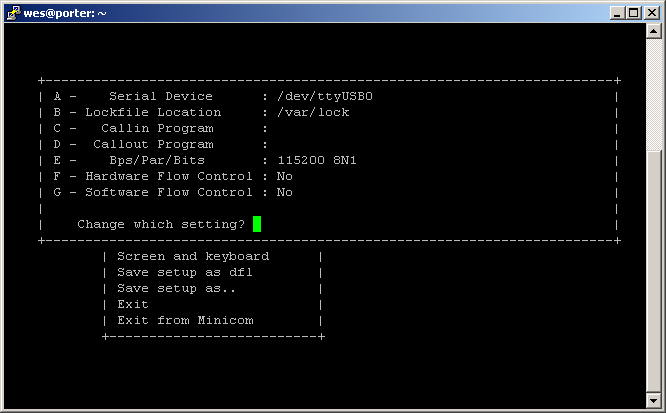
Set up the serial port parameters as shown. Notice ‘A – Serial Device’ may be different depending on your PC hardware configuration. Once done, press <ENTER> to get back to the main menu.
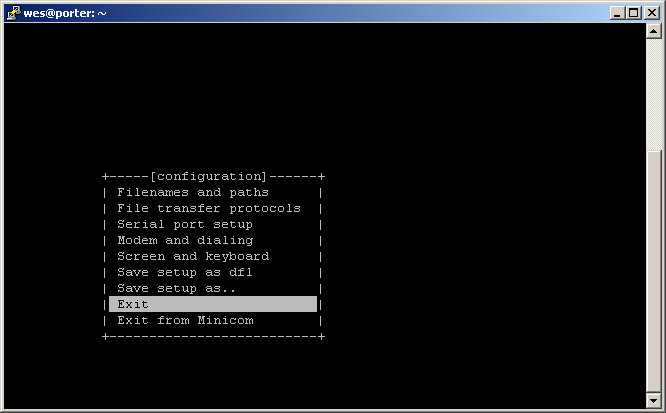
Finally, select ‘Exit’. Be sure not to select ‘Exit from Minicom’.
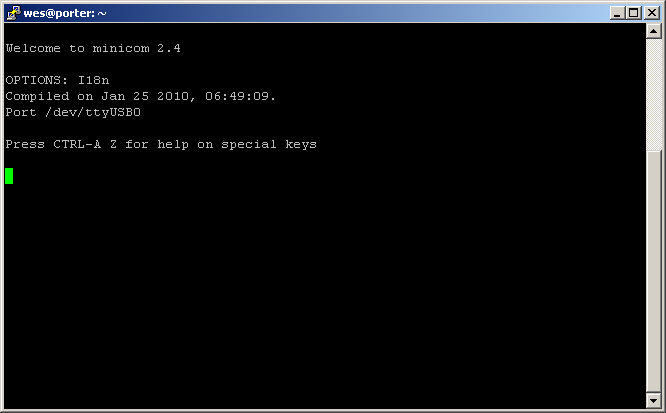
The serial session will then open.
Testing the Serial Port
With the session open, you can now start ESF on the target (via an SSH session) after deploying the com.esf.example.serial bundle to the target’s /opt/jvm/esf/dropins directory. You should see an output similar to the following.
root@localhost:/opt/jvm/esf> ./start_equinox.sh
osgi> [INFO] Junit Extender starting ...
[INFO] 2010-08-02 21:36:41.763 - com.esf.example.serial.SerialExample: waiting for serial port at USB port 4.2-1 to be detected
[INFO] 2010-08-02 21:36:42.765 - com.esf.example.serial.SerialExample: waiting for serial port at USB port 4.2-1 to be detected
[INFO] 2010-08-02 21:36:43.765 - com.esf.example.serial.SerialExample: waiting for serial port at USB port 4.2-1 to be detected
[INFO] 2010-08-02 21:36:44.766 - com.esf.example.serial.SerialExample: waiting for serial port at USB port 4.2-1 to be detected
[INFO] 2010-08-02 21:36:45.766 - com.esf.example.serial.SerialExample: waiting for serial port at USB port 4.2-1 to be detected
[INFO] 2010-08-02 21:36:46.767 - com.esf.example.serial.SerialExample: waiting for serial port at USB port 4.2-1 to be detected
[INFO] 2010-08-02 21:36:47.768 - com.esf.example.serial.SerialExample: waiting for serial port at USB port 4.2-1 to be detected
[INFO] 2010-08-02 21:36:48.768 - com.esf.example.serial.SerialExample: waiting for serial port at USB port 4.2-1 to be detected
[INFO] 2010-08-02 21:36:48.783 - com.esf.example.serial.SerialExample: new USB-to-Serial port found: /dev/ttyUSB1 at USB port address 2-1
[INFO] 2010-08-02 21:36:49.795 - com.esf.example.serial.SerialExample: serial port: /dev/ttyUSB1 now configured at 115200 8N1
[INFO] 2010-08-02 21:36:50.716 -
com.esf.example.serial.SerialExample: new USB-to-Serial port found:
/dev/ttyUSB0 at USB port address 4-2.1
It takes a bit of time because we are using a USB-to-Serial adapter. If this was a /dev/ttyS* native port, we wouldn’t have to wait for the USB Manager to detect the port. Once it is detected, it is ready to use.
Using the terminal emulator, test the SerialExample code by typing in the following phrases labeled “we send:”. This input is case-sensitive and must be entered exactly as shown. The ESF code outputs the text labeled “target outputs:”.
The following is the terminal emulator console session.
we send: hello
target outputs: Hello yourself!
we send: what is your name?
target outputs: My name is helios.
we send: bye
target outputs: That does not compute - Please ask a valid question or say hello.
we send: what do you run?
target outputs: I run ESF.
You will not see the characters you type unless you enable ‘local echo’ in your terminal emulator. See your emulator’s documentation for information on how to enable ‘local echo’.
You can download all of the source code for this example here and here. You can follow this procedure for information about how to install the example source into your workspace.